This site is supported by our readers. We may earn a commission, at no cost to you, if you purchase through links.

Pick a peach an hour too early, and you’ll get starch instead of sweetness. Wait an hour too long, and it bruises before it hits the basket. That narrow window separates a mediocre harvest from a great one, and most growers miss it more often than they’d like to admit.
Harvesting ripe fruits efficiently comes down to reading the right signals: color, give, aroma, even seed color. Add in timing, technique, and the right tools, and you’ll turn a slow, bruise-heavy pick into a smooth operation. Your crop is precious cargo — treat it that way from the first twist to the last crate.
Table Of Contents
- Key Takeaways
- How to Tell When Fruit is Ripe for Harvesting
- Best Time of Day to Harvest Ripe Fruits
- Efficient Hand-Picking Techniques for Common Fruits
- Tools and Safety Tips for Faster Fruit Harvesting
- Handling and Storing Fruit After Harvest
- Frequently Asked Questions (FAQs)
- What is the easiest fruit to harvest?
- What is the yuckiest fruit in the world?
- How do the Amish preserve fruit?
- What happens if you pick fruit too early?
- How to properly harvest fruit?
- How do you speed up the ripening of fruit?
- What is the best stage of harvesting fruit?
- How to pick fruit faster?
- How to pick out ripe fruit?
- What is the best way to store ripe fruits?
- Conclusion
Key Takeaways
- Ripeness comes through when color, gentle-pressure give, aroma, and seed color all line up, so relying on just one signal risks picking too early or too late.
- You’ll get better fruit by harvesting in the cool morning hours, since heat speeds up softening, bruising, and nutrient loss once midday sun hits.
- Matching your grip to the fruit—lift-and-twist for apples and citrus, two-hand cradling for stone fruits, pinch-and-pull for berries—cuts down on bruising and wasted crop.
- Cooling fruit within an hour of picking and separating ethylene producers like apples and bananas from sensitive fruits keeps your harvest fresh far longer.
How to Tell When Fruit is Ripe for Harvesting
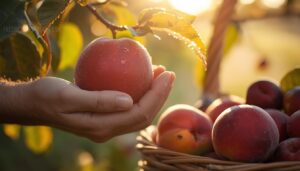
Timing is everything when you’re picking fruit at its best. Your eyes, nose, and hands all give you clues before the fruit ever hits your basket. Here are five signs that tell you it’s ready.
Once you’ve spotted those ripeness cues, gentle handling matters just as much, so brush up on harvesting techniques to avoid bruising fruit before you start picking.
Color Changes
Color tells you almost everything before you even touch the fruit. Watch for these shifts:
- Apples move from green to red as anthocyanins build up
- Apricots turn yellowish-orange
- Mangoes fade from green to orange as chlorophyll breaks down
- Bananas shift green to yellow
- Plums deepen toward purple
These visual changes often result from pigment and chemical processes within the fruit. Sunlight boosts these hues; shade dulls them. Glossiness signals perfect ripeness too.
Gentle Pressure Test
Your eyes get you close, but your fingers seal the deal. Use the finger pad technique: light pressure, no jabbing, stem end up to avoid bruising.
| Fruit Type | What You’ll Feel |
|---|---|
| Peaches/Plums | Slight give, no dent |
| Berries | Firm, barely yields |
| Citrus | Minimal softening |
Skip indentation. Tactile feedback accuracy beats guessing—your thumb knows ripeness before your eyes catch up.
Sweet Fruit Aroma
Once your thumb confirms it, let your nose finish the job. Ripe fruit releases esters, sweet-smelling compounds like ethyl butanoate, as sugars peak during maturation. Green, grassy smells fade while fruity, floral notes take over.
Trust a strong sniff test:
- A rich, sweet perfume signals peak sugar
- Faint or grassy smells mean it needs more time
- Overpowering, fermented notes mean you’ve waited too long
Seed and Stem Clues
Cut one fruit open before harvest day and check the seeds. Seed color shift from pale to dark brown signals full botanical maturity. A plump, filled seed cavity beats loose, rattling seeds every time.
Check the stem too. A thinning stem scar and slight pedicel browning mean the fruit’s ready to let go, no fighting required.
Brix and Firmness Checks
Grab a refractometer and squeeze a few drops of juice onto the prism. Brix testing measures sugar content directly, giving you numbers instead of guesses.
Pair that with tissue resistance metrics from a penetrometer. Strong sugar-firmness ratios mean peak flavor. Test multiple fruits, since sampling location bias skews single readings. This non-destructive testing combo takes the guesswork out of the fruit maturation process.
For a deeper dive into timing your harvest right, this guide on how to tell when fruit is ready to pick breaks down how firmness readings and taste tests work together to confirm peak ripeness.
Best Time of Day to Harvest Ripe Fruits
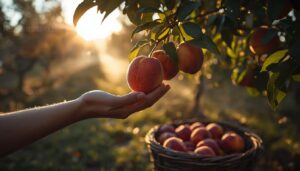
Knowing your fruit is ripe only gets you halfway there. Timing your harvest matters just as much, since heat and weather can undo all that careful watching. Here’s what you need to know about picking at the right moment.
Morning Harvest Benefits
Set your alarm early — dawn is prime time for harvesting fruit efficiently. Cool air triggers respiration rate reduction, locking in sugars and moisture before the sun climbs.
You’ll notice better nutrient density preservation, with higher vitamin C and antioxidants than afternoon picks. Pest activity stays low too, since bugs haven’t clocked in yet.
The payoff? Sharper flavor profile stability and fruit that’s genuinely ripe, not just warm.
Avoiding Midday Heat
Between 11 am and 3 pm, both you and your harvest suffer. Fruit picked in blazing heat softens fast and bruises easier during handling.
Stay hydrated — sip water every 15-20 minutes. Watch for dizziness or heavy sweating; that’s your cue to rest in shade immediately.
Schedule around the heat, not through it. Your body and your fruit quality both hold up better when you dodge peak sun hours entirely.
Weather Timing Tips
Weather calls the shots more than your calendar does. Check your 7-10 day forecast before committing to a harvest date.
- Pick before rain — wet fruit molds fast
- Watch humidity above 80% — cool it quick
- Skip windy mornings — bruising and drop risk spike
- Track diurnal swings — cool nights mean sweeter fruit
- Note microclimates — low spots ripen slower than sunny rows
Picking Before Overripening
Every fruit has a window, not a moment. Miss it and you’re stuck sorting mush instead of harvesting quality.
Ripe fruit gives you a window, not a moment—miss it, and quality turns to mush
Watch for monitoring color shifts past their peak, detecting subtle softness that’s gone too far, or aroma turning fermented instead of fresh.
Avoiding stem resistance matters too—if it’s falling on its own, you’re late. Identifying peak sweetness means picking at "just right," not "one day past.
Efficient Hand-Picking Techniques for Common Fruits
Timing gets your fruit ready, but your hands seal the deal. Every fruit has its own grip, twist, or cradle that keeps it bruise-free. Here’s how to handle the most common ones like a pro.
Lift-and-Twist Method
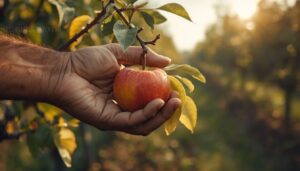
Twist wrong, and you’ll tear the branch. Twist right, and the fruit pops free clean.
Cup the fruit, lift slightly, then rotate your wrist—this clean break mechanics trick separates the stem without damage.
- Torn stems inviting rot
- Bruised skin from yanking
- Wasted fruit on the ground
- Damaged spurs killing next year’s crop
- Hours lost to sloppy picking
Precision here protects fruit attachment integrity and speeds your harvest.
Two-Hand Cradling
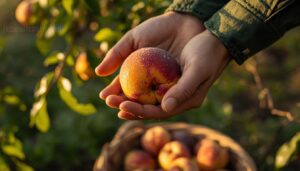
Some fruit needs both hands to come off safely. That’s where two-hand cradling earns its keep.
Your bottom hand braces the fruit’s base—steady, fixed, absorbing weight. Your top hand guides the twist, wrist doing the work while your palm cups the surface.
This grip prevents crushing on soft-skinned varieties. Think of it as your fruit’s seatbelt: secure, not squeezing, keeping quality intact until it lands in the basket.
Berries and Soft Fruits
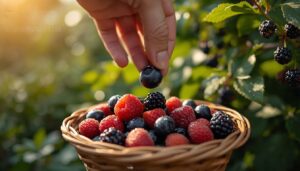
Ditch the twist here. Berries need a gentle pinch-and-pull—your grip protects fragile skin and locks in anthocyanins, the antioxidants behind that deep color.
- Bruised berries turn to mush by morning
- One crushed berry ruins a whole basket
- Gentle hands mean brighter, sweeter flavor
- Proper handling keeps hydration intact
- Careful picking preserves that jostaberry-worthy tartness
Use shallow baskets. Depth crushes precious cargo.
Apples and Pears
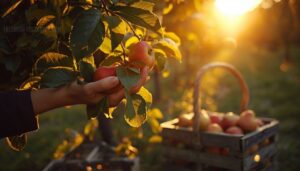
Now switch back to the lift-and-twist method for apples and pears. Cup the fruit, twist gently until the stem releases clean.
Fuji, Gala, and Honeycrisp each demand slightly different timing. Pears actually finish ripening off the tree, so pick firm and let counter-storage soften them.
For high branches, telescoping fruit pickers save your ladder trips and your back.
Peaches, Plums, and Citrus
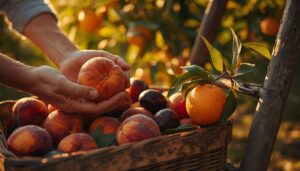
Peaches and plums are stone fruits — a single hard pit surrounded by juicy flesh — so pick with two-hand cradling to protect that soft skin from bruising.
Citrus works differently. Thicker rinds give natural protection, so lift-and-twist or clip stems close to avoid tearing.
Match your timing to climate: peaches and plums need chill hours, citrus wants subtropical warmth.
Tools and Safety Tips for Faster Fruit Harvesting
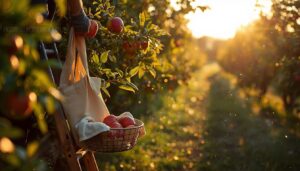
Good hands only get you so far up a tree. You’ll need the right gear to protect your fruit and yourself while working faster. Here’s what belongs in every harvester’s toolkit.
Telescoping Fruit Pickers
Can’t reach that top branch? A telescoping fruit picker solves it fast. Standard poles extend 6 to 15 feet; pro models hit 30 feet with locking sections.
- Aluminum or fiberglass poles for lightweight strength
- Locking sleeves for pole stability
- Non-slip grips for ergonomic handling
- Monthly checks keep maintenance routines simple
- Reach limitations demand realistic branch selection
Extend, align, twist gently. That’s harvesting ripe fruits efficiently.
Padded Harvest Baskets
Protecting your precious cargo starts with what you pick into, not just how you pick. Padded baskets use foam or fabric linings for real impact absorption, cutting bruises on strawberries and peaches alike.
Reinforced grips distribute weight evenly, easing hand fatigue. Look for moisture-wicking linings and durable padding that survives daily use — that’s how you protect fruit quality from field to kitchen.
Catching Nets
Catching nets turn tree-shaking into real harvest, cutting labor without bruising fruit. Choose durable polyethylene mesh over nylon for saltwater-grade toughness in orchard heat. Mesh size matters — tight enough to cushion, loose enough to avoid trapping debris.
Position nets low, coordinate multiple catchers like a mini seining crew, and inspect regularly. Torn mesh means dropped fruit and wasted effort.
Ladder Safety Basics
A ladder mistake can cost you more than fruit — it can cost you a season. Follow the 4 to 1 rule: one foot of base distance for every four feet of height. If ladder safety has you thinking harder about tree health overall, this complete guide to small orchard management techniques covers everything from pruning schedules to pest control.
Set up on stable surfaces only, keep three-point contact climbing, and inspect rails, rungs, and locks before every use.
Near power lines? Stay 10 feet clear and grab a fiberglass ladder instead.
Gloves and Eye Protection
Your hands take a beating during harvest, so leather gloves are non-negotiable for thorny trees and rough bark.
For eyes, impact resistant lenses stop flying debris cold. Choose polycarbonate safety glasses meeting ANSI Z87.1, with ergonomic eyewear fit and anti-fog coatings.
Spraying chemicals? Switch to chemical splash safety goggles. High-risk zones call for protective face shields — full agricultural safety protocols, not just eyewear.
Handling and Storing Fruit After Harvest
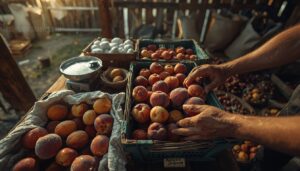
Picking your fruit is only half the job. What you do in the next few hours decides whether it lands on a plate or in the compost pile. Here’s how to handle it right, step by step.
Preventing Bruises
Every bruise you prevent is money you keep. Line padded baskets with tissue paper, and grasp fruit with fingertips, not nails.
Rotate gently while lifting — don’t yank. Keep orchard paths clear of twig litter, and cushion crates with interleaved paper. Stack no more than two layers deep.
Cradle peaches and plums with both hands. Your precious cargo deserves that care.
Sorting Damaged Fruit
Even careful picking won’t stop every bruise, so sorting catches what prevention misses. Pull damaged fruit fast — soft rot, mold, and cuts spread ethylene-driven decay to healthy neighbors. Watch for:
- Sunken, mushy patches with a sour smell
- Corky brown sunburn scars
- Fuzzy white mold spots
- Torn skin inviting rot
Grading protects market grade value. Bruised culls? Juice or compost them — nothing’s wasted.
Cooling Freshly Picked Fruit
Sorted fruit still carries field heat, and that heat is your enemy. Start cooling within one hour using forced air cooling or hydrocooling to pull temperatures down fast.
| Fruit Type | Target Temp |
|---|---|
| Berries | Near 0°C |
| Stone fruits | 0–2°C |
| Citrus | 4–7°C |
Keep humidity at 90–95% — this protects cold chain integrity from the start.
Separating Ethylene Producers
Once your fruit is cold, sort by chemistry, not just type. Some produce heavy amounts of ethylene gas, ripening everything nearby too fast.
- Apples
- Bananas
- Avocados
- Tomatoes
- Melons
Keep these away from ethylene-sensitive varieties like berries, leafy greens, and citrus. Separate storage extends shelf-life and gives you real ripening management control over your harvest window.
Freezing, Drying, and Canning
Sort your ethylene-separated harvest into three preservation lanes: flash freezing, dehydration, or canning.
| Method | Key Target | Shelf Life |
|---|---|---|
| Freezing | -18°C, prevents ice crystals | Months–2 years |
| Dehydrating | Below 20% moisture | Years, cool/dark |
| Canning | Validated seal, altitude-adjusted | 1–5+ years |
Freeze-dried fruit lasts 15-25 years with oxygen absorbers. Canning safety demands proper seals—botulism risk is real.
Frequently Asked Questions (FAQs)
What is the easiest fruit to harvest?
Blackberries top the list thanks to easy bramble picking—firm canes and clean detachment.
Blueberries follow close behind, with manageable bush height and a light tug.
Strawberries offer simple crown access, while grape trellises and self-thinning apples round out low-effort harvests.
What is the yuckiest fruit in the world?
Winners can smell like losers: durian’s sulfurous punch and noni’s fermented tang top most polarizing-fruit lists, though bitter melon’s cucurbitacins and ackee’s toxicity risks give judges plenty of competition for "yuckiest" worldwide.
How do the Amish preserve fruit?
They rely on sugar-free canning with honey or juice, traditional drying methods, natural beeswax coatings, and fermentation techniques.
Root cellar storage keeps preserved fruit stable through winter, proving old-school fruit preservation and dehydration methods still deliver serious results.
What happens if you pick fruit too early?
Roughly 34% of picked produce loses market value from poor timing.
Pick too early, and you’ll get flavor development loss, higher spoilage risk, and a tree hormonal imbalance—fruit misses its ripening window and never hits true fruit maturity or perfect ripeness.
How to properly harvest fruit?
Check color, firmness, and aroma for fruit maturity, then twist gently using the lift and twist method. Move steadily across the canopy, cradle each piece for stability, and minimize compression to prevent bruising during transport.
How do you speed up the ripening of fruit?
Like a pressure cooker for fruit, a paper bag traps ethylene gas and speeds ripening. Add a banana for a bigger boost. Keep fruit at 68–75°F. Check daily—ripening windows close fast once fruit softens.
What is the best stage of harvesting fruit?
Aim for the tree-ripe stage: full color, proper texture yield, and peak aroma all present, but flesh still firm. That’s when sugar-acid balance and seed development hit their sweet spot for flavor and handling.
How to pick fruit faster?
Speed is a beehive, not a sprint — every worker moving with purpose. Pick in systematic rows, sync morning timing with training, and smooth out basket workflow so your crew moves like one well-oiled machine, not scattered hands.
How to pick out ripe fruit?
Trust your senses. Look for color changes, press gently for give without mushiness, and breathe in that sweet aroma. Check seed development and stem looseness — these ripeness indicators rarely lie when combined.
What is the best way to store ripe fruits?
One bruised peach can rot an entire crate overnight. Store fruit in your crisper drawer at 1-4°C, separate ethylene producers like apples, and use breathable containers. Proper cold chain management and moisture control stretch shelf life 3-7 days.
Conclusion
The best pickers move slow to work fast. That’s the paradox behind harvesting ripe fruits efficiently: rushing bruises fruit and costs you money, while patience builds speed through practice.
Once you’ve trained your eyes for color, your hands for give, and your nose for that sweet aroma, the whole process becomes second nature. You won’t second-guess a peach again.
Grab your basket, trust your senses, and let this season’s harvest prove it. Precious cargo deserves nothing less.
- https://scientificdiscoveries.ars.usda.gov/tellus/stories/articles/harvesting-apples-2025
- https://www.mdpi.com/2311-7524/11/6/585
- https://www.nature.com/articles/s41598-024-52743-8
- https://pmc.ncbi.nlm.nih.gov/articles/PMC12401999
- https://link.springer.com/subjects/robotic-systems-for-automated-fruit-detection-and-harvesting