This site is supported by our readers. We may earn a commission, at no cost to you, if you purchase through links.
Most nurseries stock six herb varieties—maybe eight if you’re lucky. Meanwhile, seed catalogs list hundreds: lemon basil, Thai basil, chocolate mint, pineapple sage, and cultivars you’ve never heard of but suddenly need to grow.
That’s the power of starting herbs from seed. You’re not picking from someone else’s limited inventory. You’re choosing exactly what you want, when you want it, for less than the cost of a single nursery transplant. Skip the markup and the guesswork. Start with seeds, and you control everything from germination to harvest. The process is straightforward, the results are immediate, and the variety is endless.
Table Of Contents
- Key Takeaways
- Why Start an Herb Garden From Seed?
- Which Herbs Are Easiest to Grow From Seed?
- Where Should You Grow Herb Seeds?
- How to Prepare Soil and Containers
- Step-by-Step Guide to Sowing Herb Seeds
- Caring for Herb Seedlings and Young Plants
- Harvesting and Preserving Your Herbs
- Frequently Asked Questions (FAQs)
- How do you grow herbs from seeds?
- Can you start a herb garden from seed?
- What do you need to grow a herb garden?
- How do you start a herb garden?
- How do I choose a place to grow a herb garden?
- How to grow a Herb Garden Indoors?
- How to start an herb garden from seeds?
- Do you need to soak herb seeds before planting?
- Can I just throw herb seeds on the ground?
- How do you grow a herb garden?
- Conclusion
Key Takeaways
- Starting herbs from seed costs 1–5 cents per plant versus $2–4 for transplants, cutting your herb budget by 70–90% while unlocking hundreds of varieties nurseries don’t stock.
- Beginner-friendly herbs like basil, cilantro, and dill germinate in 5–14 days and deliver harvestable leaves within weeks when you control soil mix, light exposure, and watering from day one.
- Proper container setup requires drainage holes, a 50% potting mix with 20–30% perlite blend, and 6–8 hours of direct sunlight daily to prevent root rot and ensure strong seedling development.
- Regular pruning above leaf nodes and harvesting no more than one-third of the plant at once keeps herbs producing all season while preventing flowering that reduces leaf quality.
Why Start an Herb Garden From Seed?
Starting herbs from seed puts you in the driver’s seat from day one. You’ll save money, choose from hundreds of varieties nurseries don’t carry, and control exactly what goes into your soil.
Here’s why growing from seed beats buying transplants every time.
Benefits of Growing Herbs From Seed
Growing herbs from seed hands you total freedom. You’ll nail seed germination, master controlled growth from day one, and watch genetic diversity unfold in varieties nurseries never stock.
Before you start, check out this guide to growing herbs indoors year-round to match your seed choices with your actual setup.
Seed starting builds real skill while cutting costs to nearly nothing.
Plus, you can stagger plantings for faster harvests all season long—no more waiting on someone else’s timeline or settling for whatever’s available.
Cost Savings and Variety
Seed packets flip the script on garden budgeting—you’ll spend 1–5 cents per plant instead of $2–4 for store transplants, slashing annual herb expenses by 70–90%. That’s real long-term savings.
Seed packets cost 1–5 cents per plant versus $2–4 for transplants, cutting your herb budget by 70–90%
Plus, seed starting unlocks herb variety selection nurseries won’t carry:
- Heirloom and rare cultivars with documented germination rates
- Compact forms perfect for container gardening
- Diverse leaf flavors beyond supermarket standards
- Climate-adapted selections for successive seasons
Financial benefits compound as perennials regrow and seed cost comparison favors packets year after year.
With the right winter herb gardening techniques, your perennials can thrive indoors and save you even more money over multiple growing seasons.
Greater Control Over Growth Conditions
Beyond saving money, seed starting hands you command of every environmental variable. You’ll dial in temperature control with heat mats (65–75°F ideal), manage humidity regulation to prevent damping-off, and deliver light optimization through grow lights—no guesswork.
Sterile soil mixture in drainage-ready containers eliminates pathogens, while microclimate management keeps seedlings thriving before they ever see garden soil. That’s precision horticulture.
Which Herbs Are Easiest to Grow From Seed?
Not all herbs are created equal for starting from seed. Some sprout fast and forgive your mistakes, while others demand patience and precision you mightn’t have yet.
Learning which varieties thrive in each planting window—like growing herbs in different seasons—helps you choose seeds that actually want to grow when you’re ready to start them.
Focus on these beginner-friendly varieties that’ll give you confidence and fresh flavor without the headache.
Best Annual Herbs for Beginners
You’ll want to master a few fast-track herbs before diving deeper into your indoor herb gardening empire. Basil is your gateway herb—seedlings pop up in 5 to 10 days and deliver harvestable leaves within a month.
If you’re new to growing from seed, this beginner’s guide to seed starting walks you through the basics of germination and transplanting.
Cilantro and dill germinate in 7 to 14 days, perfect for starting an herb garden with instant gratification. Choose these varieties for foolproof seed selection and ideal growing conditions.
Simple Perennial and Biennial Herbs
You’ll dominate your garden planning with perennials like chives, thyme, and sage—hardy survivors that regenerate year after year. Biennial growth patterns in parsley mean you’ll harvest leaves the first season, then watch it flower and reseed the second.
Master seed starting with oregano and lovage for long-term herb cultivation. These herb seeds demand minimal intervention once your seedlings establish themselves in well-draining soil.
Choosing Herbs for Your Kitchen Needs
Match your culinary ambitions to the right herb seeds for maximum kitchen impact. Basil bolsters Italian and Thai dishes with distinct herb flavor profiles, while cilantro dominates Latin American and Indian recipes.
Parsley acts as your adaptable kitchen herb essential across raw and cooked applications. Mint varieties and chives complete your culinary herb arsenal—global herb traditions rely on these foundational plants you’ll cultivate from seed.
Where Should You Grow Herb Seeds?
You don’t need a fancy setup to grow herbs from seed—just a spot that meets their basic needs. Whether you’re working with a sunny windowsill, a backyard garden bed, or a few containers on your balcony, herbs will adapt if you give them the right conditions.
Let’s break down your options so you can choose the best place to start your seeds.
Indoor Vs. Outdoor Herb Gardening
Starting herb seeds indoors or outdoors hinges on light requirements and temperature control. Outdoor herb gardening delivers full-spectrum sunlight and faster growth rates, while indoor herb gardening gives you total command over soil conditions and humidity levels.
Consider these factors for seed starting success:
- Light intensity – Outdoor sun outperforms most indoor setups.
- Temperature stability – Indoor environments eliminate weather stress.
- Pest pressure – Outdoor plots face more challenges.
- Herb garden maintenance – Indoor spaces demand precise watering schedules.
Container Gardening Tips for Herbs
Container selection drives your herb success from day one. Choose pots with at least 1-gallon volume and 6–8 inches of depth for most culinary herb seeds. Drill drainage holes if needed—waterlogged soil mixtures kill seedlings fast.
Use a blend of 50% potting mix and 20–30% perlite for ideal drainage. Space optimization matters: group compatible herbs in larger planters to control microclimates.
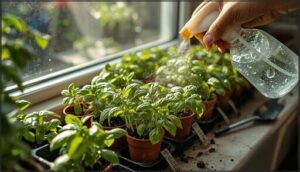
Indoor herb gardening demands consistent watering techniques and bright light.
Selecting The Best Spot for Sunlight
Your sunlight assessment starts with tracking your space for 2–3 days. Most culinary herbs demand 6–8 hours of direct light, so garden orientation matters. Evaluate microclimates near walls or reflective surfaces—they intensify heat and alter soil temperature.
- South-facing spots deliver maximum sun exposure for Mediterranean varieties
- East-facing locations offer gentler morning light and cooler afternoons
- Containers in full sun dry faster; plan irrigation accordingly
- Seasonal shifts change effective light hours—track sun path year-round
Indoor gardening and shading techniques help balance heat-sensitive herbs.
How to Prepare Soil and Containers
Your herb seeds won’t stand a chance without the right foundation. The soil mix you choose and how you set up your containers will make or break germination rates.
Here’s what you need to get your containers and soil ready for planting.
Choosing The Right Soil Mix
Your seedlings deserve the perfect foundation. Use a light, soilless mix with sterile components to minimize disease risk. Aim for soil pH levels between 6.0 and 7.0.
Incorporate perlite benefits by mixing it with coconut coir or quality potting mix—this creates drainage systems that prevent waterlogging.
Add organic matter to commercial potting mixes for ongoing nutrient availability. Proper soil preparation ensures strong germination and healthy root development.
Adding Compost for Healthy Growth
Mix mature compost into your seed starting blend at a 1:3 ratio with potting soil. This delivers slow nutrient release and boosts microbial growth without shocking tender seedlings. Compost benefits include improved soil structure and better moisture retention.
For containers, apply a thin 1–2 cm layer to prime germination. You can also brew compost tea monthly to support herb garden maintenance and strengthen young plants naturally.
Ensuring Proper Drainage in Containers
Good soil means nothing if water pools at the bottom. Drainage holes are non-negotiable—without them, you’re setting up your seedlings for root rot. Here’s how to nail container gardening tips for proper drainage:
- Select containers with pre-drilled holes in ceramic or plastic materials
- Add 1–2 inches of gravel beneath your soil mix
- Use sandy loam or peat-based blends with perlite for soil aeration
- Clear blocked holes regularly to prevent water logging and protect root health
Step-by-Step Guide to Sowing Herb Seeds
Now you’re ready to get those seeds in the ground and start your herb garden for real. The process is straightforward, but different seeds need different handling based on their size and germination needs.
Here’s exactly how to sow your herb seeds for the best results.
Seed Preparation and Planting Depths
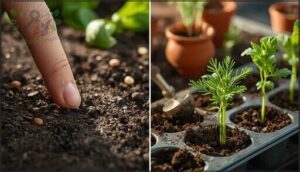
Check seed viability before you start—test a few seeds to gauge germination rates. Some herb seeds need cold stratification to break dormancy, while others sprout fast in warm soil.
Maintain soil temperature around 65–75°F for best results. Plant small seeds at shallow depths, roughly twice their diameter. Larger seeds go deeper, but don’t bury them too far or you’ll suffocate their chances.
Planting Tiny Vs. Large Herb Seeds
Tiny herb seeds sit at the surface or just below—press them in lightly and keep soil moisture consistent to avoid crusting. They’ll germinate in 5 to 14 days if you don’t let them dry out.
Large herb seeds need planting depths two to three times their diameter and take 7 to 21 days to sprout. They handle deeper sowing and produce sturdier seedlings.
Watering and Light Requirements for Germination
Seed moisture levels and light intensity drive your germination success. Keep your seed starting mix evenly moist—not soaked—and position trays where they’ll get 12 to 16 hours of light daily once seedlings emerge.
- Use grow lights 2 to 3 inches above trays for consistent light intensity
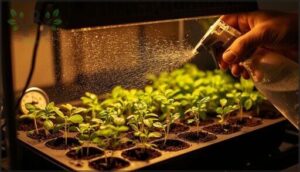
- Water with a fine mist to avoid displacing seeds
- Maintain soil temperature between 65 and 75°F for faster germination timing
- Adjust watering frequency to prevent drying between sessions
Caring for Herb Seedlings and Young Plants
Your seeds have sprouted—now the real work begins. Young herb seedlings need consistent care to develop strong roots and healthy leaves.
Master these four essential steps to transform fragile sprouts into thriving plants ready for your garden.
Watering and Feeding Seedlings
Your seedlings are alive—now keep them thriving. Water when the soilless mix feels like a wrung-out sponge, not saturated. Use room-temperature water to avoid shocking tender roots.
After true leaves appear, feed with quarter-strength fertilizer to prevent root burn. Bottom watering reduces disease risk during germination.
Master seed moisture and transplant care now, and you’ll never lose another herb plant to neglect.
Thinning and Transplanting Tips
Overcrowding kills more seedlings than neglect. Thin plants to 2-3 inches apart using clean scissors, removing the weakest at soil level.
When true leaves emerge and stems thicken to pencil width, you’re ready for transplanting. Water thoroughly before moving plants, transplant on cloudy afternoons, and water again to settle roots. This minimizes transplant shock and accelerates root development for proper garden spacing.
Preventing Pests and Disease in Young Herbs
Clean tools and sterile soil prevent most disease problems before they start.
Scout seedlings weekly for aphids, thrips, and fungus gnats—catching pests early gives you control. Apply organic soap sprays or beneficial insects when needed, and maintain humidity below 70% to stop mold.
Water at soil level, never overhead, and remove any diseased plants immediately to protect your entire herb garden.
Hardening Off Seedlings for Outdoors
Your indoor-grown herbs won’t survive a direct move outside—they need gradual exposure to win the outdoors battle.
Follow this hardening-off sequence:
- Start 7–10 days before transplanting—expose seedlings 1–2 hours daily, increasing incrementally.
- Shield from direct sun initially—use sheltered spots like porches for acclimation techniques.
- Monitor weather forecasting closely—avoid windy days and temps below 10°C.
- Control humidity and check for pests—water beforehand and inspect daily during outdoor gardening tips transitions.
Harvesting and Preserving Your Herbs
You’ve put in the work to grow your herbs from seed—now it’s time to reap the rewards. Harvesting at the right moment locks in flavor and keeps your plants producing all season long.
Here’s how to harvest like a pro, prune for maximum growth, and preserve your bounty for months to come.
When and How to Harvest Herbs
Your harvest timing matters more than you think. Cut leafy herbs like basil and cilantro just before flowering to boost leaf quality and essential oils. Use clean, sharp scissors and snip just above a leaf node—this encourages bushier growth. Never take more than one-third of the plant at once. These herb harvesting methods keep your garden producing all season long.
Pruning Techniques for Continued Growth
Regular pruning keeps your herbs vigorous and productive. Pinch back young stems just above a leaf node to stimulate bushier growth and encourage branching. Remove spent flower heads to redirect energy into fresh foliage. Light, frequent trims work better than heavy cuts—aim for 20-30% of foliage at a time.
Essential Herb Renewal and Growth Stimulation Tips:
- Use clean, sharp pruning tools to minimize tissue damage and prevent disease spread.
- Pinch basil frequently to maintain compact growth and prevent flowering.
- Trim woody herbs like rosemary sparingly to avoid dieback in older stems.
- Cut mint aggressively to control spreading and boost vigor.
- Remove damaged leaves promptly to prevent pest attraction and disease entry.
Drying, Freezing, and Storing Fresh Herbs
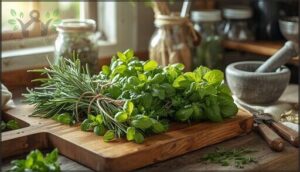
Once you’ve pruned your herbs, preserve that fresh flavor through simple drying techniques or freezer storage. Air dry bunches upside down in a dark, well-ventilated spot for 1-14 days—this method locks in volatile oils without heat damage.
For frozen harvesting, skip blanching and flash-freeze whole leaves on trays.
Store dried herbs in airtight containers away from light for 6-12 months of peak flavor.
Frequently Asked Questions (FAQs)
How do you grow herbs from seeds?
Growing herbs from seed sounds complicated, but it’s simpler than buying transplants. You control seed viability, germination rates, soil quality, light exposure, and water management—mastering herb gardening for beginners through deliberate seed starting outdoors or indoors.
Can you start a herb garden from seed?
Yes, you can start an herb garden from seed. Seed starting gives you control over germination, soil preparation, and herb varieties—expanding your garden planning options while keeping costs low for beginners growing herbs indoors or out.
What do you need to grow a herb garden?
You’ll need quality seed packets, well-draining potting mix, containers with drainage holes, a sunny spot or grow lights, basic gardening tools, and a watering system—everything essential for successful indoor gardening techniques and container gardening for herbs.
How do you start a herb garden?
Pick your seeds first—basil, cilantro, or parsley work best for beginners.
Then prep containers with drainage holes, fill with seed-starting mix, and choose a spot getting six hours of sunlight daily.
How do I choose a place to grow a herb garden?
Choose a location with at least six hours of direct sunlight daily. Confirm well-draining soil and good air circulation.
Consider climate, wind exposure, and proximity to your kitchen for easy herb garden design and harvesting access.
How to grow a Herb Garden Indoors?
Set up your indoor herbs near a south or west window for 6-8 hours of light.
Use containers with drainage holes, sterile soil, and balanced fertilizer.
Monitor for aphids and spider mites regularly.
How to start an herb garden from seeds?
A journey of a thousand miles begins with a single step—and your herb garden starts with smart seed selection, careful soil preparation, and proper germination conditions.
Master these fundamentals, and you’ll enjoy fresh flavors year-round through strategic container gardening and proven seed starting methods.
Do you need to soak herb seeds before planting?
Most herb seeds don’t require soaking—basil, dill, and oregano germinate readily without it. However, parsley and cilantro benefit from brief soaking to boost germination rates and improve seed viability through better water absorption.
Understanding the importance of methodological rigor is vital for evaluating the effectiveness of such gardening techniques.
Can I just throw herb seeds on the ground?
Don’t scatter seeds randomly on bare ground—germination rates plummet without proper soil preparation methods and seed depth importance. Direct sowing risks include temperature swings and predation.
Press seeds into prepared beds for reliable herb planting success.
How do you grow a herb garden?
Choose quality seeds, prepare well-draining soil with compost, and sow at proper depths. Water consistently, provide 6–8 hours of sunlight daily, and prune regularly to encourage growth and prevent pests.
Conclusion
A nursery shelf limits you; a packet of seeds unlocks your choices. You’re no longer a shopper—you’re the grower, the selector, the one who decides what fills your garden and your kitchen.
When you learn how to start an herb garden from seed, you trade dependence for control. Your hands shape every leaf and stem.
Pick your seeds, set your soil, and let your garden speak for you. The power is yours—plant it, grow it, own it.

