This site is supported by our readers. We may earn a commission, at no cost to you, if you purchase through links.

The best vegetables don’t all peak in July. Kale sweetens after a light frost, radishes size up fast in cool soil, and pumpkins tell you they’re ready with hard rinds and deep color.
That’s the quiet logic behind seasonal vegetable harvesting: plant with the weather, harvest at the right stage, and your garden works with nature instead of against it. When you match crops to day length, soil temperature, and frost dates, you get better flavor, steadier yields, and fewer problems in storage.
A little timing changes everything, from what you grow first to how long the harvest lasts each season.
Table Of Contents
- What is Seasonal Vegetable Harvesting?
- Choosing Vegetables for Each Season
- Preparing Your Garden for Planting
- When and How to Harvest Vegetables
- Top 6 Products for Seasonal Harvest Success
- Frequently Asked Questions (FAQs)
- How do you prevent pests during fall planting?
- What companion plants work best in October gardens?
- Can you succession plant vegetables in autumn months?
- How much water do fall-planted crops need?
- Which vegetables improve flavor after first frost?
- How can pests impact vegetables near harvest?
- Which tools make harvesting faster and safer?
- Can vegetables be harvested after a light frost?
- How should drought change harvest schedules?
- What causes bland flavor in freshly picked vegetables?
- Conclusion
What is Seasonal Vegetable Harvesting?

Seasonal vegetable harvesting is about working with the natural timing of each crop in your garden or region. It helps you see why planting, picking, and storing vegetables all depend on the season.
For practical timing tips, this seasonal crop harvesting guide for home gardeners explains when vegetables are truly ready.
The next points explain what “seasonal” means, why it matters, and what affects harvest timing.
Definition and Etymology of Seasonal
A good starting point is the word itself: seasonal grew from Latin Roots, through Medieval Usage, into today’s Seasonal Semantics. This Etymology Timeline traces Word Evolution from timely farm cycles to modern seasonal produce, seasonal food, and seasonal eating. In practice, it means crops match their proper time, like peas in cool spring beds.
- seasonal produce guide
- seasonal produce calendars
- seasonal produce
Importance of Seasonal Cycles in Agriculture
From that idea of timing, you can see why seasons run the garden. Seasonal cycles shape Soil Microbe Activity, Nutrient Cycling, and Pest Pressure Timing, so your crops grow with less stress.
They also define the harvest season in the regional agricultural produce overview, whether you use a seasonal produce guide or seasonal produce calendars.
Climate Adaptation Strategies help you match crops to shifting frost and heat, while seasonal nutrition improves when vegetables mature in their window, despite Market Price Fluctuations.
Cultural and Economic Impact of Seasonal Harvests
When you follow seasonal cycles in the garden, you also step into community life. Harvest time shapes Festival Food Traditions, regional cuisines, and seasonal eating patterns across the United States, from fall pumpkin suppers to spring greens on family tables.
Following seasonal harvests connects the garden to community life, shaping local food traditions from spring greens to fall pumpkins
It also strengthens local food systems. A farmers market helps farm-to-table sales, and Farmers Market Pricing often rises for peak produce because quality and flavor are highest.
That demand creates a Seasonal Employment Surge for picking, washing, packing, and selling. Just as importantly, surplus harvests can support Community Food Security through food banks and meal programs.
In towns, festivals bring an Agritourism Boost that helps farms, shops, and workers alike.
Seasonal Variations and Growing Conditions
Weather changes through the year, setting the pace in your beds.
- Temperature Fluctuations shape crop maturity and show the temperature’s influence on fruit flavor.
- Daylength Influence guides Seasonal planting and harvest recommendations.
- Soil Moisture Management maintains soil moisture and harvest readiness.
- Pest Dynamics and Humidity Stress often shift Harvest Timing as warm, wet spells raise disease pressure in vegetables, fast.
Choosing Vegetables for Each Season

The best vegetables for your garden depend on your climate, your season, and how much cold your crops can handle. It sort your choices by weather, growth habit, and how quickly each crop matures.
The list below will help you match the right vegetables to each part of the growing year.
USDA Hardiness Zones and Climate Considerations
Your hardiness zone is your garden’s compass. USDA Zone Mapping shows how climate zones shape planting windows, Harvest Timing, and Regional differences in fruit and vegetable harvests.
Since warmer minimums have shifted many areas into new half-zones, you may now see a longer Frost-Free Period, but that doesn’t erase Microclimate Effects around walls, slopes, or low spots.
- Match varieties to winter lows and Heat Tolerance.
- Check Chilling Hours for crops that need cool nights.
- Watch the temperature influence on fruit flavor during ripening.
- Track soil moisture and harvest readiness together after rain or heat.
That’s why you should pair the zone map with local frost dates, rainfall, and field notes. Small climate shifts can change results fast within one season.
Fall and Winter Vegetable Selection
Although frost is coming, you can still choose crops that work with it, not against it. Build your list around kale, cabbage, pumpkins, and storage types for winter squash harvesting months, then support them with Cold-Frame Crops, Companion Planting Winter, Mulch Strategies Winter, and Garden Bed Insulation.
Winter Market Trends also favor dependable keepers that hold well in a root cellar through cold weather, easily.
Leafy Greens Vs. Root Crops
Because space and timing matter, you should match crop type to your goal.
Leafy greens give quick harvests, high vitamin content, and suit cut-and-come-again greens harvesting, but warm spells raise bolting risk.
Root crops need greater root depth, yet they store longer, offer stronger flavor contrast and cooking versatility, and respond well when you cure root crops.
Good harvest timing, careful postharvest handling, and proper temperature and humidity protect quality best.
Easy-to-Grow and Frost-Hardy Varieties
Want a crop that forgives mistakes? Choose Open-pollinated seeds with Cold tolerance traits and Fast germination varieties.
- Spinach and arugula suit cut-and-come-again greens harvesting.
- Kale and parsnips gain frost sweetening; add Row cover usage and Mulch for frost.
- Note Winter squash harvesting months, cold storage temperatures, and Root cellar use for potatoes, onions, and winter squash for reliable cool-season harvests outdoors.
Preparing Your Garden for Planting

good harvest starts before the first seed goes into the ground.
A few setup choices now will affect how well your crops root, grow, and handle the season ahead. The next list covers the main options to think through before you plant.
Soil Preparation and Fertility
Healthy soil is your garden’s quiet engine. Begin with Soil Testing to guide pH Management, then improve structure with Compost Incorporation, so roots move easily and nutrient accumulation stays steady.
Add Cover Crops and Mulch Application to support soil moisture management, reduce soil moisture impact from heat, and feed microbes.
In organic farming, crop rotation keeps beds while compost and a pH of 6.0 to 7.0 help vegetables grow strong.
Starting Seeds Vs. Transplanting
Think of seeds as your long game, and transplants as a head start.
- Seeds cost less.
- Direct Seeding Advantages keep roots intact.
- Indoors, meet Germination Light Requirements.
- Use the Seedling Hardening Process for Transplant Shock Mitigation, and Transplant Timing Optimization.
- Check your garden planting schedule, garden planning, and planting dates, plus seed packet guidelines, especially seed packet guidelines for harvest timing, and watch soil moisture management from sowing.
Indoor and Outdoor Planting Tips
After sowing indoors or setting out transplants, match crop to place. Use Light Management and Watering Strategies indoors, with Temperature Control near 65 to 75°F.
Outdoors, follow Garden planning and planting dates, your garden planting schedule, and the maturity date listed on the seed packet.
Watch plant stress indicators and temperature and humidity thresholds for specific vegetables.
Use south windows or full-spectrum lights sixteen hours daily.
| Area | Focus |
|---|---|
| Indoors | Container Gardening |
| Beds | Pest Prevention |
| Seedlings | morning light |
| Transplants | steady moisture |
Extending The Growing Season
From seedling care, look ahead to keeping beds productive longer. Use:
- Row Covers or Low Tunnels to add a few degrees and protect cut-and-come-again crops.
- Cold Frames or Hoop Houses to hold solar warmth, steady harvest timing, and stretch greens weeks past frost.
- Mulch Insulation plus a garden monitoring schedule to limit soil cooling, then pair crops with temperature control for storage or cold and dry storage after picking. This protection can extend harvests by one to two months easily.
When and How to Harvest Vegetables
Knowing when to harvest is just as important as knowing how to grow. Each vegetable sends you clear signals when it’s ready — you just need to know what to look for.
Here’s what to pay attention to as you move through the harvest process.
Signs of Vegetable Maturity

Catching vegetables at peak ripeness isn’t luck — it’s reading the right cues. Signs of vegetable ripeness come through color change, firmness test results, aroma development, and size indicators together.
| Vegetable | Signs of Ripeness | What to Check |
|---|---|---|
| Tomato | Full color shift, fruity aroma | Firm texture with slight give |
| Melon | Blossom-end fragrance | Skin texture softens at stem |
| Bell Pepper | Glossy, uniform color | Size, color, and firmness |
| Cucumber | Bright scent near stem | Firm, smooth skin |
| Beet | Enlarged bulb, green tops | Size, color, and firmness |
Trust size, color, and firmness together — never just one signal.
Harvesting Techniques for Different Crops

Evaluating vegetable maturity through size, color, and firmness guides timing the vegetable harvest for best flavor. Best practices for harvesting different vegetable crops depend on crop type and clean tools.
- Leafy greens: cut outer leaves early and keep the crown intact.
- Root crops: loosen soil first, then lift beets or carrots gently.
- Fruiting crops: use Tomato Color Check, Pepper Glossy Skin, Eggplant Firmness Cue, and the Cucumber Snap Test before clipping.
- Beans and peas: support the vine and pick at Bean Pod Crispness for tender pods, for best flavor and less plant damage.
Maintaining Plant Productivity After Harvest

How do you keep plants working after picking?
Use pruning for harvest, remove yellow leaves to promote continued growth, and water by sound Irrigation Management.
Add compost for Soil Replenishment and Nutrient Recycling, lay mulch for smart Mulching Strategies, and sow Cover Crops in open beds.
Favor cut-and-come-again crops for extended harvest seasons, including cut-and-come-again greens harvesting, plus postharvest handling to prevent disease and rot.
Storing and Preserving Fresh Produce

Although harvest ends in the garden, your work isn’t done. Start with Temperature Control and Humidity Management: refrigerate greens and roots, cold, store potatoes dark and dry, and keep apples away from ethylene-sensitive crops. These storage methods for harvested produce slow wilting, rot, and flavor loss.
For long keeping, use Vacuum Sealing, Blanch and Freeze tender vegetables, and learn Canning Basics for safe jars. Good canning techniques, freezing methods, and drying fruits and vegetables all matter when preserving produce through canning, freezing, drying, so your harvest feeds you well into winter ahead.
For best root storage, consider store potatoes dark and dry.
Top 6 Products for Seasonal Harvest Success
A good harvest starts with a few reliable basics that fit the season and the way you grow.
The next six picks can help you plant on time, keep crops moving, and use your space well indoors or out.
Use this list as a simple starting point for choosing what to add to your garden this season.
1. Fresh Purple Garlic Bulbs for Planting
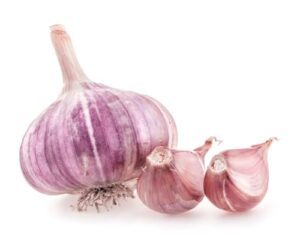
Purple garlic is one of the easiest fall crops you can plant. These bulbs give you a strong, rich flavor for cooking and a simple way to grow your own seed garlic at home.
Choose firm bulbs with tight purple skins and no soft spots. Break the bulb apart just before planting, then set each clove pointed end up, 2 to 3 inches deep, in loose, well-drained soil with a pH near 6.0 to 7.0.
Space cloves 4 to 6 inches apart and mulch after planting to protect roots through winter. Full sun, moderate water, and steady weeding matter.
Plant in late fall or early spring, and harvest the bulbs once lower leaves yellow.
| Best For | Home gardeners and cooks who want easy-to-grow, strong-flavored garlic they can plant in small spaces or use fresh in the kitchen. |
|---|---|
| Product Form | Garlic bulbs |
| Growing Season | Fall or spring |
| Growing Space | Beds or containers |
| Planting Method | Plant cloves |
| Harvest Timing | When leaves yellow |
| Best For | Home cooks |
| Additional Features |
|
- Strong, rich flavor that works well for home cooking.
- Easy to grow in garden beds or containers when planted in the right season.
- Non-GMO and marketed as chemical-free, which appeals to gardeners who want more control over what they grow.
- Quality can be inconsistent, with some buyers reporting soft, rotten, or pest-damaged bulbs.
- The pack size appears small, so it may not be enough for bigger gardens.
- Growth success depends on timing, soil, and care, so not every clove will perform well in poor conditions.
2. Winter Gem Lettuce Seeds Heirlooms
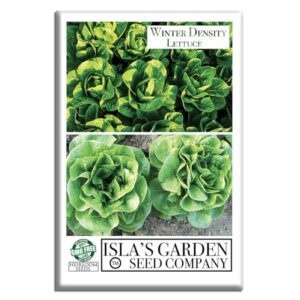
Need a lettuce that won’t quit when cold weather moves in? Winter Gem is a compact heirloom lettuce that gives you dense, upright heads about 6 to 8 inches tall, with crisp, buttery leaves and a mild, sweet flavor.
It suits cool-season planting best, since it tolerates frost and stays slow to bolt, though heat above 72 °F can push it too far.
Sow seed about 1/4 inch deep in rich, well-drained soil, then thin plants to 8 to 12 inches apart for heads. You can grow it in beds, raised boxes, or containers.
Harvest in the morning, around 65 days from sowing, for the best crunch.
| Best For | Home gardeners who want a compact, frost-tolerant heirloom lettuce for cool-season growing in beds, raised planters, or containers. |
|---|---|
| Product Form | Lettuce seeds |
| Growing Season | Cool season |
| Growing Space | Beds or containers |
| Planting Method | Sow seeds |
| Harvest Timing | About 65 days |
| Best For | Cool-season gardeners |
| Additional Features |
|
- Frost-tolerant and slow to bolt, so it performs well in spring, fall, and protected winter gardens.
- Compact heads with sweet, crisp leaves make it great for salads, sandwiches, and small-space growing.
- Open-pollinated, GMO-free heirloom seeds with a large packet size offer good value for repeated planting.
- Germination can be inconsistent, with some growers reporting poor emergence or weak seedlings.
- Warm weather above about 72 °F can trigger bolting and reduce performance.
- Needs thinning and, in colder areas, may still require extra frost protection for best results.
3. Indoor Herb Garden Starter Kit
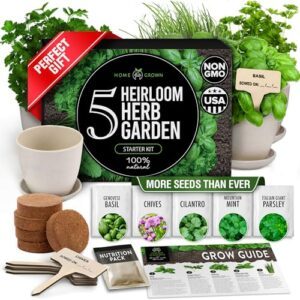
Short on garden space? This indoor herb garden starter kit lets you grow basil, chives, cilantro, mint, and parsley on a bright windowsill through every season. The set includes sealed heirloom, non-GMO seeds, soil pellets, reusable pots with trays, wooden markers, a kelp nutrition packet, and a simple grow guide, so setup is quick and clear.
Sow the seeds after unboxing, give them steady moisture, and aim for bright light, or 12 to 16 hours under an LED if your window is dim. Most herbs sprout in 7 to 14 days. Once leaves fill out, trim often to encourage bushy growth and a longer harvest at home.
| Best For | Apartment dwellers, beginner gardeners, and gift shoppers who want an easy, compact way to grow fresh herbs indoors year-round. |
|---|---|
| Product Form | Herb starter kit |
| Growing Season | Year-round indoors |
| Growing Space | Windowsill or balcony |
| Planting Method | Sow kit seeds |
| Harvest Timing | After leaf fill |
| Best For | Beginners and apartment dwellers |
| Additional Features |
|
- Complete kit with five heirloom, non-GMO herb varieties plus soil pellets, pots, markers, nutrients, and a grow guide.
- Beginner-friendly setup with pre-measured components that works well on a windowsill, balcony, or small patio.
- Fresh herbs for cooking year-round, and it also doubles as a fun hands-on project for kids or first-time growers.
- Germination can be inconsistent, with some users reporting poor results from mint and chives.
- Reusable plastic pots and trays may warp over time and can spill if watered carelessly.
- Higher price than a DIY setup, and the seed quantity may feel limited if you want a bigger harvest.
4. Live Dinosaur Kale Plants Tuscan
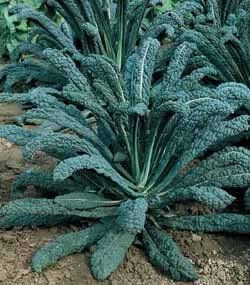
Want a faster path to fall greens? These live Dinosaur kale plants give you a head start, since you’re setting out two established Tuscan kale transplants instead of waiting for seed germination.
Each plant arrives 5 to 7 inches tall in its own 4-inch pot, with a rooted, sturdy base that settles in quickly. The dark blue-green leaves have the classic pebbled surface of lacinato kale and a mild, slightly nutty flavor.
Plant them in full sun to light shade, in rich, well-drained soil, and space them 12 to 18 inches apart. Keep moisture even, mulch the soil, and pick the outer leaves first.
That simple routine keeps the crown growing. Frost improves flavor, so these plants are a dependable choice for cool-season harvests and winter cooking too.
| Best For | Gardeners who want a quick start on cool-season greens with two established Dinosaur kale plants that are easy to grow in beds, containers, or bright indoor spaces. |
|---|---|
| Product Form | Live kale plants |
| Growing Season | Cool season |
| Growing Space | Beds or containers |
| Planting Method | Set transplants |
| Harvest Timing | Pick outer leaves |
| Best For | Quick-start growers |
| Additional Features |
|
- Arrives as two live, rooted plants in 4-inch pots, so you can skip seed starting and get growing faster.
- Produces dark blue-green, bumpy Tuscan kale leaves that are sturdy, flavorful, and great for salads, cooking, or juicing.
- Nutrient-dense heirloom variety that grows well in a range of setups with proper light, moisture, and moderate temperatures.
- Live plants need prompt care after delivery, including planting, watering, and enough light to stay healthy.
- Growth can slow or stress in extreme heat or cold, so timing and climate matter.
- Only two plants are included, which may not be enough for bigger harvests, and they can still attract pests like aphids or cabbage worms.
5. Black Spanish Radish Seeds for Planting
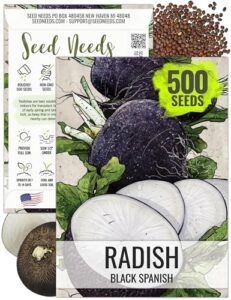
After steady kale picking, you can turn that same cool bed over to Black Spanish radish. This heirloom winter radish grows rounded black roots, usually 3 to 4 inches wide, with crisp white flesh and a strong, peppery bite.
Sow seeds directly in loose, well-drained soil, about 1 to 2 centimeters deep, and keep moisture even while seedlings establish. Roots size up best in cool weather, around 50 to 70 degrees Fahrenheit, and are usually ready in about 60 days.
Harvest before roots grow coarse. Stored unwashed in a perforated bag at 34 to 40 degrees Fahrenheit, they keep well for weeks, and the leafy tops are edible too.
| Best For | Home gardeners and cool-season growers who want a hardy heirloom radish with bold flavor, quick maturity, and good storage potential. |
|---|---|
| Product Form | Radish seeds |
| Growing Season | Cool season |
| Growing Space | Garden beds |
| Planting Method | Direct sow |
| Harvest Timing | About 60 days |
| Best For | Storage-minded gardeners |
| Additional Features |
|
- Produces flavorful 3 to 4 inch roots with crisp white flesh and a strong, peppery bite.
- Fast-growing winter radish that is typically ready to harvest about 60 days after emergence.
- Heirloom, open-pollinated, and non-GMO seeds with packet instructions that are helpful for beginners.
- Germination can be inconsistent, with some growers reporting low or no emergence.
- Performs best in cool weather and may struggle in hot climates.
- One packet may not provide enough seed for larger planting areas.
6. Holland Red Shallots Bulbs for Planting
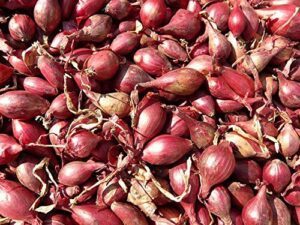
After the Black Spanish radish comes out, you can use that open bed for Holland Red shallots. These red-skinned heirloom bulbs are planted as sets, not seed, and each one can divide into a cluster of new bulbs.
Set them with the tip up, cover with 1 to 2 inches of soil, and space them 6 to 8 inches apart in full sun. Loose, well-drained soil with compost helps prevent rot and promotes larger bulbs. Plant in fall in mild areas or early spring in colder ones.
Harvest when the tops turn yellow and fall over, then cure in airy shade. Stored cool and dark, cured shallots keep for months.
| Best For | Home gardeners who want an easy, compact way to grow organic heirloom red shallots in small beds, containers, or seasonal planting cycles. |
|---|---|
| Product Form | Shallot bulbs |
| Growing Season | Fall planting |
| Growing Space | Small plots or containers |
| Planting Method | Plant bulbs |
| Harvest Timing | After bulb growth |
| Best For | Small-space gardeners |
| Additional Features |
|
- Organic, heirloom, and GMO-free bulbs appeal to growers who want a more natural planting option.
- Bulbs are sold as sets, which makes planting simpler and faster than starting from seed.
- Compact growing habit works well in small garden plots, raised beds, or containers.
- Sprouting success can be inconsistent, with some buyers reporting only about half the bulbs grew.
- Some bulbs may arrive soft, moldy, squishy, or already sprouting, which can reduce planting viability.
- Quality inconsistency may lead to waste and lower harvests, especially for first-time gardeners.
Frequently Asked Questions (FAQs)
How do you prevent pests during fall planting?
An ounce of prevention matters: cover beds with row covers, rotate crops, mulch two to three inches deep, clear debris, and use neem or beneficial insects early.
Stagger sowing to dodge flea beetles and aphids.
What companion plants work best in October gardens?
Marigolds help protect October beds from nematodes. Dill, cilantro, and nasturtiums draw helpful insects or distract aphids.
Radishes loosen soil between spinach and beets, while chives or garlic scallions help repel pests around leafy greens.
Can you succession plant vegetables in autumn months?
Like keeping a relay moving, you can succession plant through autumn by sowing lettuce, arugula, spinach, cilantro, and radishes every two to three weeks, starting six to eight weeks before frost for picking into winter.
How much water do fall-planted crops need?
Most fall-planted crops need about 1 to 5 inches of water each week, including rain.
Water deeply once or twice weekly, keep soil moist, and check moisture 1 to 2 inches down before irrigating again.
Which vegetables improve flavor after first frost?
After one sharp frost, kale tastes as if someone stirred in sugar.
Brussels sprouts, cabbage, parsnips, carrots, spinach, chard, pumpkins, and winter squash often grow sweeter and milder as cold turns stored starches into sugars.
How can pests impact vegetables near harvest?
Near harvest, pests can ruin quality quickly. Aphids curl leaves, thrips scar fruit, and root maggots deform carrots.
Whiteflies spread disease, while Botrytis and late blight cut shelf life, storage quality, and marketable yield quickly.
Which tools make harvesting faster and safer?
Use ergonomic hand pruners with sharp blades for clean, quick cuts. Long-reach pruners reduce bending.
Add puncture-resistant gloves, eye protection, and non-slip shoes.
Lightweight totes and harvest carts move produce faster and lower strain safely.
Can vegetables be harvested after a light frost?
Yes, many vegetables can be picked after a light frost. Greens, brassicas, and root crops often stay usable, and some taste sweeter.
Check for blackening or mushy spots, harvest sound parts, then cool them quickly.
How should drought change harvest schedules?
Under a bright sky, shift picking to cool mornings or evenings, scout fields daily, and harvest sooner when crops color fast, bolt, or drop fruit.
Tight windows demand cooling, staggered crews, and closer irrigation checks.
What causes bland flavor in freshly picked vegetables?
Bland flavor usually comes from fast, watery growth, picking too early, low sugars, weak acidity, and poor aroma compound development.
Overwatering, excess nitrogen, cloudy weather, nutrient imbalance, and warm storage can leave vegetables tasting flat.
Conclusion
As the seasons ebb and flow like a gentle river, your garden’s rhythm harmonizes with nature’s.
By embracing seasonal vegetable harvesting, you’ll discover a world of vibrant flavors and bountiful yields. With every carefully chosen crop and precisely timed harvest, your garden flourishes.
The art of seasonal harvesting becomes second nature, guiding you toward a more abundant and satisfying gardening experience.
Your journey starts now; plant, harvest, and savor the rewards of a well-tended garden.