This site is supported by our readers. We may earn a commission, at no cost to you, if you purchase through links.
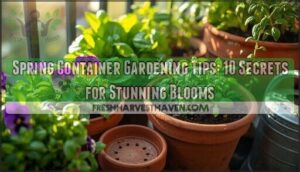 Spring container gardening tips reveal incredible potential for any space.
You’ll want containers with drainage holes that are at least 12 inches deep for most plants. Choose quality potting mix—never garden soil, which compacts and drowns roots.
Select cool-season plants like pansies, lettuce, and herbs that thrive in spring temperatures. Water when the top inch feels dry, and fertilize every two weeks with diluted liquid fertilizer.
Place containers where they’ll get morning sun but afternoon shade. The secret? Think of containers as mini ecosystems that need more attention than ground plants.
Master these fundamentals, and you’ll discover how strategic plant combinations and timing tricks can transform even the smallest balcony into a productive garden paradise.
Table Of Contents
- Key Takeaways
- Choosing Right Containers
- Selecting Spring Plants
- Preparing Container Soil
- Planting Spring Containers
- Maintaining Container Gardens
- Managing Container Pests
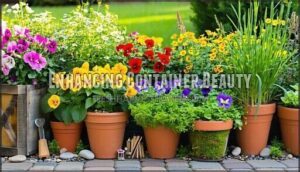
- Enhancing Container Beauty
- Promoting Healthy Growth
- Troubleshooting Common Issues
- Maximizing Container Potential
- Frequently Asked Questions (FAQs)
- How do I start a container garden in spring?
- What makes a good Spring container garden?
- Is spring a good time to plant a container garden?
- What is a Spring container garden?
- Are container gardens right for the south?
- What can you put in a container for spring?
- What to put in planters in the early spring?
- What is the most common mistake made with container plants?
- What are the secrets to container gardening success?
- Can you grow plants in containers?
- Conclusion
Key Takeaways
- Choose containers with drainage holes at least 12 inches deep and fill them with quality potting mix—never garden soil that compacts and drowns roots.
- Plant cool-season varieties like pansies, lettuce, and herbs that thrive in spring temperatures and can handle light frosts.
- Water when the top inch feels dry and fertilize every two weeks with diluted liquid fertilizer since container plants depend entirely on you for nutrients.
- Position containers for morning sun but afternoon shade and think of them as mini ecosystems needing more attention than ground plants.
Choosing Right Containers
Your container choice sets the foundation for spring gardening success, directly impacting plant health and growth potential.
Perfect containers are your plants’ first home—choose wisely and watch them flourish from day one.
The right size, material, and drainage features transform ordinary pots into thriving mini-ecosystems that’ll keep your plants happy all season long, which is crucial for complete concepts like these to flourish.
Container Size Options
When choosing containers, you’re basically picking your plants’ new homes. Pot volume directly impacts root development and overall plant success, so matching container size to your plants’ needs isn’t just helpful—it’s essential.
Here’s your container sizing roadmap:
- 1-gallon pots: Perfect for herbs like basil or small flowers with shallow root systems
- 2-3 gallon containers: Ideal for leafy greens and compact vegetables that need moderate root space
- 5-gallon vessels: Handle deep-rooted tomatoes and peppers with significant plant height
- Large containers: Essential for plants requiring extensive root development and vertical growth
Selecting the right size can be simplified by considering actual pot dimensions. Consider container weight and space constraints when planning your container garden layouts.
Material Selection
Once you’ve nailed down container size, material selection becomes your next game-changer. Each option brings unique trade-offs that’ll impact your gardening success.
Terracotta Pros shine through natural breathability and timeless appeal, though frequent watering becomes necessary since these porous beauties dry out fast. Plastic Cons include less aesthetic appeal, but they’re lightweight champions that retain moisture beautifully—perfect Budget Options for beginners.
Metal Concerns center on soil overheating during summer scorchers, though their durability and sleek look can’t be beaten. Wood Longevity depends on proper liner installation to prevent rot, but wooden planters deliver unmatched rustic charm.
Ecofriendly pots made from recycled materials offer sustainable choices without sacrificing function. Consider exploring various terracotta pot options for your garden.
Material Strengths Challenges
Drainage Considerations
Container garden drainage determines whether your spring plants thrive or struggle with waterlogged roots. Without adequate drainage holes, you’re setting yourself up for disaster – root rot kills more container plants than drought ever will.
Proper drainage guarantees plants stay healthy, roots breathe freely, and spring gardens flourish magnificently.
Pot elevation improves drainage solutions while preventing soil compaction. Consider insert usage like Ups-A-Daisy planter inserts for enhanced material breathability.
Here’s what proper drainage delivers:
- Prevents Root Rot: Excess water escapes before overwatering damages delicate root systems
- Maintains Soil Structure: Keeps potting mix loose and prevents dangerous compaction around roots
- Optimizes Watering Frequency: Creates ideal moisture balance for consistent plant hydration
Elevate containers with pot feet for maximum drainage efficiency!
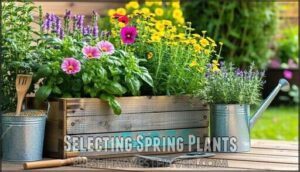
Selecting Spring Plants
Selecting the right plants transforms your spring containers from ordinary to extraordinary.
You’ll want to focus on three key categories: compact varieties that won’t outgrow their homes, vibrant flowers that create stunning displays, and fresh herbs that bring both beauty and flavor to your outdoor space.
Compact Plant Varieties
You’ll discover amazing potential when you choose the right plants for your containers. Compact varieties transform tiny spaces into productive gardens without overwhelming your setup.
| Plant Type | Container Size | Growth Habit |
|---|---|---|
| Dwarf vegetables | 2-3 gallon | Bush-style, contained |
| Patio herbs | 1 gallon | Upright, manageable |
| Miniature gardens | 5 gallon+ | Layered, space-efficient |
Dwarf vegetables like cherry tomatoes and mini bell peppers thrive in tight corners while delivering full-sized flavor. Patio herbs such as basil and thyme add culinary value without sprawling beyond their boundaries.
These compact plant varieties create stunning balcony blooms that maximize every square inch of your growing space. To maximize yields, consider companion planting strategies to achieve productive gardens and enjoy the benefits of container gardening.
Colorful Flower Options
Transform your containers into color powerhouses with vibrant flower combinations. Petunias and pansies deliver reliable spring gardening tips success, while calibrachoa cascades beautifully.
Fragrant varieties like sweet alyssum add sensory appeal alongside bold tulips. Consider using wallflowers, or Erysimum for containers, to combine with tulips in larger displays.
Color combinations that work:
- Purple petunias with yellow nasturtiums for complementary contrast
- Monochromatic blues using plumbago and angelonias
- Pink dianthus paired with pale blue lobelia textures
- Warm yellows mixing lantanas with golden sweet flag
Edible Herb Choices
Beyond colorful blooms, edible herbs transform your containers into productive flavor factories. Culinary herb profiles like basil, thyme, and chives thrive in 1-gallon pots, making perfect herb companion plants.
Match herb container size to root depth—shallow herbs need less space than deep-rooted varieties. Watering herb needs vary, so check soil moisture daily.
Create stunning herb container combinations by pairing similar water requirements. Harvesting herbs regularly encourages fresh growth.
These container garden ideas blend beauty with practicality, turning your spring gardening tips into delicious rewards.
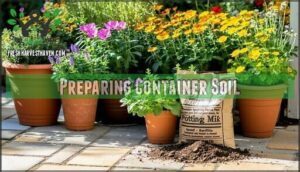
Preparing Container Soil
Your soil choice determines whether your spring containers thrive or merely survive through the growing season.
The best potting mixes combine sphagnum peat moss, aged bark, and perlite to create the perfect balance of drainage, aeration, and moisture retention that container plants desperately need.
Potting Mix Selection
Your plants need the right foundation to flourish. Quality potting mix beats garden soil every time—it won’t compact and drains properly.
Here’s what makes potting mix work:
- Sphagnum peat moss provides excellent moisture retention while staying lightweight
- Perlite or bark chips create air pockets for healthy root development
- Compost or organic matter delivers slow-release nutrients throughout the growing season
Look for sterilized mixes to prevent disease issues. Selecting the best soil blends is vital for ideal growth. Pre-made blends often include fertilizer, saving you time and guesswork.
Soil Amendments
Your potting mix transforms with strategic soil amendments that boost performance. Organic matter like compost enriches nutrients, while mineral additives such as perlite improve drainage and aeration.
These additions create the perfect growing environment for spring containers. Understanding how soil layers are structured can further optimize your mix.
Smart soil preparation starts with these proven amendments:
- Mix compost at 10-20% volume for nutrient boosters
- Add perlite for enhanced water retention balance
- Incorporate worm castings for slow calcium release
- Use agricultural lime for pH adjustments (6.0-7.0 range)
- Blend thoroughly rather than layering amendments.
Soil testing helps determine which organic amendments your potting mix needs most.
Avoiding Yard Soil
With spring container gardening, you’ll want to skip the backyard dirt—it’s a recipe for disaster.
Regular garden soil creates soil compaction, blocking air pockets your roots desperately need.
Think of it as suffocating your plants in plastic wrap.
Garden soil brings uninvited guests: weed seeds, pests, and diseases that’ll crash your container party.
Plus, drainage issues and nutrient imbalance turn your dream garden into a soggy mess.
| Problem | Garden Soil | Quality Potting Mix |
|---|---|---|
| Drainage | Poor, waterlogged | Excellent flow |
| Disease Risks | High pathogen load | Sterile, safe |
| Structure | Compacts easily | Stays fluffy |
High-quality container garden soil delivers the goods—proper aeration, drainage, and garden soil improvement that actually works.
Your spring garden tips start here: invest in real potting mix for spring container gardening success.
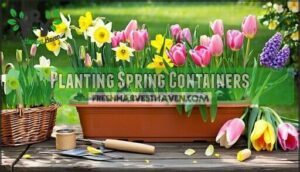
Planting Spring Containers
Now you’re ready to transform your prepared containers into spring masterpieces using proper planting techniques.
The key lies in strategic plant placement, gentle watering methods, and smart fertilization timing that sets your containers up for months of vibrant blooms.
Arranging Plants
You’ll create stunning displays by mastering strategic plant placement techniques.
Follow the thriller-filler-spiller arrangement for professional-looking container garden design:
- Plant Grouping: Position tall thrillers at center or back for dramatic focal points
- Height Balance: Surround with medium fillers to create layered depth and structure
- Texture Combinations: Mix bold foliage with delicate leaves for dynamic contrast
- Color Coordination: Choose complementary or monochromatic schemes for cohesive Visual Appeal
- Container Arrangements: Let spillers cascade over edges, softening hard container lines
This systematic approach transforms ordinary pots into eye-catching plant combinations that’ll make neighbors pause and admire your gardening prowess.
To keep your plants healthy, verify proper soil drainage to avoid root rot.
Watering New Plantings
Kick-start your initial hydration routine by soaking containers until water flows freely through drainage holes, ensuring complete water absorption throughout the root zone.
Check soil moisture daily with the finger test—stick your digit two inches down to gauge wetness. Root establishment depends on consistent moisture without waterlogging.
| Watering Factor | New Plantings | Established Plants | Notes |
|---|---|---|---|
| Frequency | Daily check | Every 2-3 days | Adjust for weather |
| Watering Depth | Deep soak | Moderate amount | Until drainage occurs |
| Best Timing | Morning/evening | Morning/evening | Reduces evaporation |
| Seasonal Adjustments | Heavy in heat | Reduce in cool weather | Monitor plant response |
Initial Fertilization
Start strong with balanced liquid fertilizer diluted to half strength—your spring seedlings can’t handle full-power nutrients yet.
Slow-release options mixed into potting soil provide steady feeding for months. Organic boosters like worm castings won’t burn tender roots.
Check nutrient ratios on labels; 10-10-10 works well for most flowers. Remember: over-fertilizing kills faster than under-fertilizing.
These container gardening tips guarantee healthy initial hydration and vigorous growth all season long.
Maintaining Container Gardens
Once your spring containers are planted, proper maintenance keeps them thriving throughout the growing season.
You’ll need to establish consistent watering routines, provide regular nutrition, and perform strategic pruning to maximize blooms and prevent common problems.
Watering Schedule
Proper watering-schedule mastery transforms struggling containers into flourishing spring displays. You’ll master this essential skill through consistent soil moisture monitoring and strategic timing adjustments.
Container plants typically need daily attention, though shaded specimens may require watering every other day.
Here’s your action plan:
- Check soil moisture by inserting your finger 1-2 inches deep into potting mix
- Water during ideal timing – early morning or evening prevents fungal issues
- Watch for wilting signals as your plants’ natural cry for hydration
- Consider automation options like self-watering systems for busy schedules
Seasonal adjustments matter substantially – temperature spikes demand increased frequency, while cooler spring days allow longer intervals.
Drainage importance can’t be overstated; waterlogged roots spell disaster faster than drought conditions.
Fertilization Tips
Now that you’ve got watering down, feeding your plants properly becomes your next priority. Container plants depend entirely on you for nutrients since they can’t spread roots into garden soil.
Start with slow-release fertilizer mixed into your potting soil at planting time. This prevents nutrient deficiency for weeks. Add liquid feeds every two weeks during active growth. Heavy feeders like tomatoes need more frequent applications to avoid problems like blossom end-rot.
| Fertilizer Types | Application | Best For |
|---|---|---|
| Granular slow-release | Mix at planting | All containers |
| Liquid concentrate | Every 2 weeks | Heavy feeders |
| Organic options | Monthly top-dress | Vegetables |
| Worm castings | Season-long | Sensitive plants |
| Compost tea | Weekly spray | General feeding |
Match your feeding schedule to plant needs—flowers want balanced nutrition while vegetables crave extra nitrogen for leafy growth.
Pruning Techniques
Master three essential pruning techniques to keep your container gardens flourishing and productive throughout spring.
- Deadheading flowers: Snip spent blooms weekly to trigger encouraging blooms and extend flowering seasons.
- Shaping growth: Trim leggy stems and overgrown branches for compact, bushy plants.
- Removing suckers: Clip unwanted shoots from herb bases to concentrate energy into main stems for stronger growth.
Managing Container Pests
Even the best container gardens can attract unwanted guests like aphids, spider mites, and whiteflies that’ll munch on your spring blooms.
You’ll need smart strategies to keep these tiny troublemakers from turning your beautiful containers into their personal buffet.
Common Pest Issues
Container pests can wreck your spring blooms faster than you’d think. Identifying Pests early saves your garden from major damage.
Early pest detection beats treatment every time—your garden’s health depends on it.
Watch for these telltale signs:
| Pest | Visual Clues |
|---|---|
| Aphids | Sticky honeydew, curled leaves |
| Spider Mites | Fine webbing, yellow speckling |
| Whiteflies | Tiny white clouds when disturbed |
| Thrips | Silver streaks, black specks |
Check your containers weekly, focusing on leaf undersides where pests hide. Pest Prevention beats treatment every time.
Encourage Natural Predators like ladybugs and lacewings by planting diverse flowers nearby.
Organic Pest Control
When pests invade your containers, organic pest control offers safe, effective solutions that protect both plants and beneficial insects.
These natural methods work without harsh chemicals.
- Neem oil disrupts insect feeding and reproduction cycles—mix 1 teaspoon per liter of water and apply every 7-14 days for broad-spectrum control
- Diatomaceous earth creates a protective barrier by desiccating crawling pests’ exoskeletons; dust lightly on soil and reapply after watering
- Homemade sprays using garlic, chili pepper, or soap provide immediate knockdown of soft-bodied insects like aphids
Companion planting with marigolds or basil naturally repels unwanted visitors while attracting beneficial insects like ladybugs and lacewings that devour pests.
Preventative Measures
Beyond organic solutions, you’ll want to build strong defenses before pests arrive.
Regular plant inspection and pest monitoring catch problems early, while proper drainage solutions prevent root rot that attracts insects.
Tool sterilization between plants stops disease spread, and consistent watering practices maintain soil health.
Smart spring garden care means container garden maintenance becomes second nature.
| Prevention Strategy | Key Benefit |
|---|---|
| Daily plant inspection | Early pest detection |
| Tool sterilization | Disease prevention |
| Proper drainage | Healthy root systems |
These pest deterrents work better than any spray you’ll find.
Enhancing Container Beauty
You can transform your spring containers from simple plant holders into eye-catching focal points with smart decorative choices.
The right combination of attractive pots, supportive structures, and finishing touches creates professional-looking displays that’ll make your neighbors stop and stare, with smart decorative choices being key to achieving this effect.
Decorative Pot Options
Your container choice shapes your garden’s personality more than you might realize.
Pot Material Impact affects both aesthetics and plant health – terracotta pot breathes beautifully but requires frequent watering, while plastic retains moisture longer. Container Color Psychology plays a role too; lighter colors reflect heat, darker ones absorb it.
Themed Pot Styles let you express creativity through plant container design.
Consider these aesthetic style pairing ideas:
- Rustic charm: Weathered wooden boxes with trailing herbs
- Modern minimalist: Sleek concrete planters with architectural succulents
- Vintage cottage: Painted metal buckets overflowing with colorful annuals
- Bohemian flair: Woven baskets lined with moss and bright flowers
DIY Pot Decor and Upcycled Container Ideas transform budget pot alternatives into stunning decorative pots without breaking the bank.
Trellis Installation
Vertical gardening transforms containers into towering displays of beauty.
Installing trellises provides essential plant support while maximizing your growing space through strategic height utilization.
Choose from various trellis types based on your plants’ climbing habits and weight requirements.
Bamboo tepees work perfectly for lightweight vines, while sturdy metal frames handle heavier climbers.
| Trellis Type | Installation Depth | Material Durability | Best Plants |
|---|---|---|---|
| Bamboo Tepee | 6-8 inches | 2-3 seasons | Beans, peas |
| Wire Frame | 4-6 inches | 5+ seasons | Morning glories |
| Lattice Panel | 8-10 inches | 10+ seasons | Clematis, roses |
Secure your trellis installation before planting to prevent root disturbance later.
This aesthetic integration creates stunning vertical gardening displays with the help of strategic height utilization and essential plant support, leading to towering displays of plants like clematis and roses.
Mulch Application
After setting up your trellis, mulch application becomes your secret weapon for container success.
A proper 2-inch layer delivers impressive mulch benefits like enhanced soil moisture retention and temperature control.
Popular mulch types include bark chips, straw, and coconut coir—all excellent choices for spring gardening.
Consider these mulch alternatives for your container gardening tips:
- Shredded leaves from your yard cleanup
- Dried grass clippings (pesticide-free only)
- Decorative stone for Mediterranean-style containers
Apply mulch after planting but before summer heat arrives.
This application depth prevents root competition while maintaining that picture-perfect look.
Promoting Healthy Growth
You’ll achieve stunning blooms by mastering three growth factors: light exposure, temperature control, and moisture balance. Understanding these environmental conditions transforms ordinary containers into thriving garden showcases.
Light Requirement
Mastery begins with understanding your plants’ Light Intensity needs. Full Sun lovers like tomatoes crave 6+ hours of direct sunlight, while Partial Shade plants prefer morning sun with afternoon protection.
Check plant tags for specific Light Requirements and observe your space’s Sunlight Exposure patterns throughout the day.
- Track shadows dancing across your containers to map changing sun patterns
- Harness Reflected Light from walls to boost brightness in dimmer spots
- Deploy Artificial Lighting when Mother Nature doesn’t cooperate with your spring garden tips
Smart Container Gardening Tips include grouping plants by Sun Exposure needs and rotating pots weekly for even growth.
Temperature Considerations
Two main threats derail spring container success: frost damage and heat stress.
Monitor temperature fluctuations closely—seasonal changes catch gardeners off-guard. Create microclimates using water-filled jugs for thermal mass around sensitive plants.
Check your hardiness zones before planting, ensuring frost tolerance matches your area. Heat acclimation prevents shock when temperatures spike unexpectedly.
Move containers strategically throughout the day—morning sun exposure followed by afternoon shade works wonders for temperature preferences.
Humidity Management
Perfect air circulation becomes your secret weapon for humidity management in container gardens.
While temperature considerations protect your plants from extremes, controlling humidity levels prevents those sneaky fungal problems that can crash your spring party.
You’ll want to space containers strategically—think of it as giving each plant room to breathe rather than cramming them together like sardines.
Use gentle misting sparingly to mimic morning dew without creating a soggy mess.
Position your containers where natural breezes flow freely, preventing that stuffy greenhouse effect that invites trouble.
This approach helps in maintaining a healthy environment for your plants.
- Monitor plant spacing to confirm adequate air circulation between containers
- Check humidity levels regularly using visual cues like condensation on leaves
- Apply organic mulch benefits to retain soil moisture while preventing surface dampness
- Adjust your watering schedule based on humidity fluctuations and temperature considerations
Troubleshooting Common Issues
Even the best container gardens hit rough patches, but spotting problems early saves your spring display from disaster.
You’ll learn to identify overwatering, underwatering, and nutrient deficiency signs before they turn your blooming beauties into wilted disappointments.
Overwatering Signs
Most container gardeners don’t realize they’re drowning their plants with kindness. Overwatering symptoms appear gradually, making detection tricky.
Watch for yellowing leaves that start from the bottom—your first red flag. Wilting leaves seem contradictory, but waterlogged roots can’t absorb nutrients properly.
Check for soil mold, appearing as white or gray fuzzy growth on the surface. Root rot develops when drainage fails, creating foul-smelling, mushy roots that doom your plants.
Edema symptoms manifest as water-filled blisters on leaf surfaces, indicating cellular damage. Stunted growth occurs when roots suffocate in soggy conditions.
One key to prevention is to verify species specific requirements to guarantee proper hydration. Stick your finger two inches deep—if it’s consistently wet, you’re overdoing your watering schedule.
Proper container garden care means finding that sweet spot between moisture and drainage.
Underwatering Symptoms
While overwatering drowns your plants, underwatering starves them of life-giving moisture.
Your container garden care routine should include checking for these telltale signs of thirsty plants:
- Leaf Wilting – drooping foliage that looks defeated
- Dry Soil with visible cracking patterns
- Stunted Growth – plants staying disappointingly small
- Blossom Drop – flowers falling prematurely
- Crispy Edges on browning leaves
These underwatering symptoms demand immediate attention.
Wilting leaves and soil cracking signal your plant watering schedule needs adjustment for healthier container gardens.
Nutrient Deficiency
While overwatering drowns your plants, nutrient deficiency starves them slowly.
You’ll spot nitrogen deficiency through yellowing leaves, while phosphorus deficiency stunts roots.
Potassium deficiency creates brown leaf edges, and magnesium deficiency yellows leaf veins.
Iron deficiency turns new growth pale.
Identifying deficiencies starts with recognizing these deficiency symptoms early.
Soil testing reveals exactly what’s missing, letting you choose appropriate fertilizer types.
Organic solutions work best—compost for nitrogen, bone meal for phosphorus, wood ash for potassium.
Quick fixes save your spring blooms.
Maximizing Container Potential
You’ve discovered the secret to making every square inch of your container garden work harder for you.
By combining vertical growing techniques with smart plant partnerships and strategic timing, you’ll transform simple pots into productive garden powerhouses.
That keep delivering fresh blooms and harvests all season long, utilizing strategic timing to maximize output.
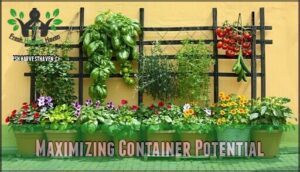
Vertical Gardening
Maximizing vertical space transforms cramped patios into flourishing spring garden containers.
Here’s how you’ll create stunning vertical interest:
- Install climbing plants on sturdy trellises for beans or morning glories
- Hang hanging baskets at varying heights for cascading petunias
- Build living walls using pocket planters for herbs and strawberries
- Construct pallet gardens with multiple planting levels for vegetables
- Design stacked planters using graduated pot sizes for maximum impact
This container gardening approach doubles your growing space while improving air circulation around plants.
Companion Planting
Beyond vertical solutions, companion planting transforms your containers into thriving ecosystems. Strategic plant combinations deliver multiple benefits through natural partnerships.
Pest Deterrents: Basil repels aphids from tomatoes while marigolds protect vegetables from harmful insects. These aromatic allies create natural barriers without chemicals.
Growth Synergy: Shallow-rooted lettuce pairs perfectly with deep-rooted peppers, maximizing space optimization while preventing nutrient competition.
Flavor Enhancement: Herbs like thyme and oregano intensify vegetable flavors when grown together, creating gourmet harvests from compact containers.
Pollinator Attraction: Nasturtiums and sweet alyssum draw beneficial insects that boost fruit and seed production throughout your spring garden.
- Plant aromatic herbs near vegetables for natural pest control
- Combine shallow and deep-rooted plants for efficient space usage
- Mix flowering plants with edibles to attract pollinators
- Pair complementary plants that enhance each other’s growth
This container gardening approach creates balanced mini-ecosystems that work smarter, not harder.
Succession Planting
Staggered planting reveals continuous blooms and extending harvest throughout your spring garden.
Plant fast-growing crops like lettuce every two weeks, then rotate with warm-season varieties for seasonal varieties succession.
This crop rotation strategy maximizes your containers’ potential, delivering fresh vegetables and vibrant spring flowers from early spring into summer using smart succession planting techniques.
To further optimize yields, consider strategic timing methods for continuous harvests.
Frequently Asked Questions (FAQs)
How do I start a container garden in spring?
Ready to transform any space into a blooming oasis?
Choose 2-3 gallon containers with drainage holes, fill with quality potting mix, and plant after frost danger passes.
Water consistently and place strategically for ideal sunlight exposure.
What makes a good Spring container garden?
You’ll want well-draining containers with quality potting mix, compact varieties like dwarf tomatoes and herbs, and consistent watering schedules. Choose frost-resistant plants and position containers for ideal sunlight exposure.
Is spring a good time to plant a container garden?
You’ll get the best results planting containers after your last frost date passes.
Spring’s mild temperatures and increasing daylight create ideal conditions for establishing healthy root systems before summer heat arrives.
What is a Spring container garden?
A spring container garden is a portable planting system using pots or containers to grow flowers, vegetables, or herbs outdoors.
You’ll enjoy maximum flexibility, moving plants for ideal sunlight while creating beautiful displays without traditional garden beds, which allows for beautiful displays.
Are container gardens right for the south?
Container gardens thrive in the South’s long growing season and intense heat. You’ll just need heat-tolerant varieties, consistent watering, and proper drainage to combat humidity-related issues.
What can you put in a container for spring?
Container plants with 50% faster spring growth rates thrive when you choose cool-weather champions like hellebores, sweet alyssum, pansies, violas, and daffodils.
These hardy beauties handle temperature swings while delivering colorful blooms through unpredictable spring weather patterns.
What to put in planters in the early spring?
Plant cool-season vegetables like lettuce, spinach, and peas in your early spring planters.
Add colorful pansies, violas, and primrose for instant blooms.
These hardy plants tolerate light frosts while establishing strong roots.
What is the most common mistake made with container plants?
Out of sight, out of mind" perfectly describes overwatering—you can’t see roots drowning below.
You’re likely watering daily instead of checking soil moisture first.
Most container plants die from waterlogged roots, not drought.
Feel the soil; water only when dry.
What are the secrets to container gardening success?
You’ll nail container gardening if you pick the right pot size, use high-quality potting mix, and check drainage holes.
Water consistently, adjust for weather, and always watch for wilting—plants talk, you just need to listen!
Can you grow plants in containers?
Like telegraphs once revolutionized communication, you’ll find containers transform any space into a productive garden.
You’re not limited by yard size—pots accommodate everything from herbs to tomatoes.
Proper drainage, quality potting mix, and consistent watering create thriving portable gardens anywhere, with proper care.
Conclusion
Studies show container plants require 50% more water than ground-planted specimens, making proper hydration essential for success.
These spring container gardening tips transform any space into a thriving garden when you master the fundamentals. You’ve learned to select appropriate containers, choose cool-season varieties, and maintain consistent care schedules.
Remember that containers are living ecosystems requiring daily attention. With proper drainage, quality potting mix, and strategic plant placement, you’ll achieve stunning results.
Start small, experiment with combinations, and watch your confidence grow alongside your plants, leading to stunning results.

