This site is supported by our readers. We may earn a commission, at no cost to you, if you purchase through links.
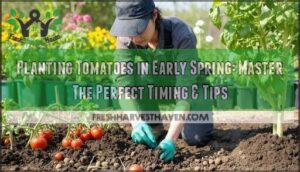 Planting tomatoes in early spring requires strategic timing and protective measures to succeed.
You’ll want to wait until about two weeks before your last frost date, then use cold protection methods like Wall-O-Water systems or row covers to shield young plants from temperature swings.
Start with cold-hardy varieties and verify your soil temperature reaches at least 60°F before transplanting.
The key is balancing your enthusiasm to get growing with practical protection – because nobody wants to watch their precious seedlings turn into tomato popsicles overnight.
Smart timing and the right protective gear can extend your growing season substantially.
Table Of Contents
Key Takeaways
- Wait until nighttime temps stay above 50°F and use cold protection like Wall-O-Water or row covers to shield young plants from frost.
- Pick fast-ripening tomato varieties to beat unpredictable spring weather and get an earlier harvest.
- Prep your soil by loosening it deeply, mixing in compost or manure, and adjusting pH to 6.0-6.8 for strong root growth.
- Start seeds indoors 6-8 weeks before your last frost, then harden off seedlings before transplanting for the best survival and growth.
Choosing Tomato Varieties
You’ll want to pick varieties that ripen quickly since early spring can be unpredictable with weather changes.
Early maturing tomatoes like ‘Early Girl‘ (50 days) and ‘Bush Early Girl‘ (54 days) give you the best shot at a successful harvest before any late cold snaps hit your garden.
Beat the clock with fast-ripening varieties that mature before spring’s unpredictable weather strikes your garden.
Early Maturing Varieties
When you’re enthusiastic for early spring tomatoes, early maturing varieties are your best bet for quick harvest.
These fast-growing champions give you ripe tomatoes weeks before standard varieties, making spring planting incredibly rewarding.
Top Early Maturing Varieties:
- Early Girl – Ready in just 50 days
- Bush Early Girl – Compact version, matures in 54 days
- Juliet – Small grape tomatoes in 60 days
- Celebrity – Classic slicing tomato in 65 days
Heirloom Tomatoes
Heirloom tomatoes bring generations of rich tomato flavor and stunning fruit color to your early spring garden.
These vintage varieties, passed down through families, offer unmatched taste that store-bought tomatoes can’t match.
When starting tomatoes indoors for heritage growing, choose heirloom seeds based on your climate and space. These treasured varieties reward patient gardeners with incredible diversity in size, color, and flavor profiles that’ll make your spring harvest truly special.
Cherry Tomatoes
When choosing cherry varieties for early spring planting, you’re picking winners that mature faster than their larger cousins.
Cherry tomatoes like ‘Super Sweet 100‘ ripen in just 65 days, giving you quicker fruit production.
These bite-sized gems are perfect for continuous harvesting throughout the season.
Their compact growth makes garden care simpler, and early maturing varieties help you beat frost while maximizing your ‘spring planting window‘.
Their early maturation is a key factor, as it allows for a longer ‘continuous harvesting‘ period, making them ideal for gardeners who want a steady supply of fresh produce.
Beefsteak Tomatoes
Looking beyond your typical tomato, beefsteak tomatoes are the heavyweights you’ll want for sandwiches and grilling.
These giants can weigh over a pound each, offering that perfect meaty texture that slices beautifully.
When planting tomatoes in early spring, choose determinate varieties for concentrated harvests.
These beauties need extra beefsteak care—sturdy stakes and regular tomato pruning help support their impressive fruit size.
For a successful harvest, understanding best summer varieties is vital for achieving a bountiful yield.
Paste Tomatoes
When sauce making becomes your passion, paste tomatoes are your best kitchen allies.
Roma Varieties and ‘San Marzano‘ excel at canning tips with their low moisture content and meaty texture.
These Italian recipes superstars transform into rich tomato puree without excess water.
For your spring gardening tips, choose early maturing varieties that handle planting tomatoes in cold soil better than delicate types.
Preparing Soil for Tomatoes
Your soil is the foundation that makes or breaks your spring tomato success.
Get your soil preparation right, and you’ll set yourself up for stronger plants, healthier root systems, and a more abundant harvest come summer.
Loosening Soil Depth
You’ll want to break up compacted soil to give your tomato roots room to spread.
Dig down at least 12 inches deep using a shovel or garden fork. This soil loosening creates the aeration your plants need for strong root growth.
Properly loosened soil lets roots penetrate easily and improves drainage. Think of it like fluffing a pillow – your tomatoes will thank you.
To achieve ideal soil conditions, understanding garden fork techniques is vital for effective soil turnover, which is crucial for strong root growth.
Adding Organic Matter
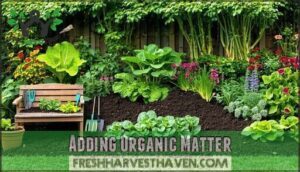
Think of organic matter as your soil’s breakfast – it feeds both plants and beneficial microbes.
Mix compost or aged manure into your soil to improve structure and create a nutrient-rich foundation.
Compost benefits include enhanced drainage and water retention.
These organic fertilizers slowly release nutrients through natural cycling, supporting long-term soil health for robust tomato growth.
Adjusting Soil PH
Your soil’s pH can make or break your tomato harvest. Most tomatoes thrive in slightly acidic conditions between 6.0-6.8.
Test your soil first, then adjust accordingly:
- Soil Testing: Use a digital meter or test kit to check current pH levels
- Lime Addition: Add agricultural lime to raise pH if soil is too acidic
- Acidic Conditions: Lower pH with sulfur or organic matter if needed
- Fertilizer Balance: Choose fertilizers that won’t disrupt your target pH range
- Nutrient-Rich Soil: Proper pH guarantees your plants can actually absorb available nutrients
Proper pH management is crucial for a successful harvest, and by following these steps, you can ensure your tomato plants receive the best conditions to thrive.
Using Compost or Manure
Rich organic matter transforms poor soil into a nutrient-packed foundation for your tomato plants.
Mix aged compost or well-rotted manure into your garden bed, creating a soil enrichment powerhouse.
These organic amendments provide a steady nutrient boost while improving drainage and water retention.
Compost benefits include balanced nutrition, while different manure types offer varying nutrient profiles for ideal soil preparation, providing a steady nutrient boost.
Planting Tomato Seeds
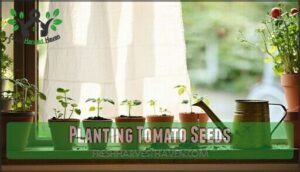
You’ll get the best results when you start tomato seeds indoors about 6-8 weeks before your area’s last frost date.
This timing gives your seedlings a strong head start and guarantees they’re ready to transplant once temperatures consistently stay above 50°F at night, which is a crucial factor for their survival and successful transplantation.
Starting Seeds Indoors
Starting tomato seeds indoors gives you a serious head start on the growing season. Begin your seed selection process 6-8 weeks before your last frost date.
Use quality seed starting mix in containers with proper drainage. Indoor lighting helps boost germination rates – aim for 14-16 hours daily. Keep water temperature around 70-75°F for faster sprouting.
Both determinate tomatoes and indeterminate tomatoes benefit from this early start before hardening off begins. For ideal results, consider using a Tomato Seed mix that’s specifically designed for indoor starting, which can provide a serious head start and help with faster sprouting.
Direct Sowing Outside
You can direct sow tomato seeds outdoors once all frost risk passes and soil temperature reaches 65-70°F.
Wait for consistent nighttime temperatures above 50°F and daytime temps of 65-70°F.
Plant seeds ¼ to ½ inch deep using proper sowing techniques.
Check your last frost date and monitor weather closely before outdoor timing decisions, ensuring you make informed choices with consistent nighttime temperatures in mind.
Soil Temperature Requirements
Think of soil warmth as your tomato’s warm blanket—without it, growth stalls.
Test soil temperature by inserting your finger one minute deep; you’ll need consistent 60°F minimum, ideally 65-70°F.
Essential soil temperature requirements:
- Check temperature at 4-inch depth using soil thermometer
- Wait until nighttime temperatures stay above 50°F consistently
- Use black plastic mulch for natural soil heating
- Monitor thermal management through morning temperature readings
- Consider raised beds for faster soil warming
Cold soil below 50°F prevents nutrient uptake, causing stunted growth despite frost protection efforts.
Using Quality Seeds and Mix
Quality seed selection and soil mix form the foundation of your tomato planting guide success.
Certified seeds achieve 98% genetic purity with 90%+ germination rates. Choose disease-resistant varieties for 40% fewer crop losses.
Use sterilized seed-starting trays with nutrient-rich soil containing 70% peat moss and 30% perlite for ideal seedling development.
For superior results, understanding indoor growing conditions is vital for seedling care.
| Seed Selection Factor | Quality Standard |
|---|---|
| Germination Rate | Above 95% success |
| Genetic Purity | Up to 98% certified |
| Disease Resistance | 40% loss reduction |
| Seed Storage | Cool, dry conditions |
| Mix Composition | 70% peat, 30% perlite |
Transplanting Tomato Seedlings
Once your seedlings have developed 7-10 leaves and nighttime temperatures stay above 50°F, it’s time to move them outdoors.
You’ll want to harden them off gradually over a week, then transplant in late afternoon to reduce shock and help them establish strong roots.
Hardening Off Seedlings
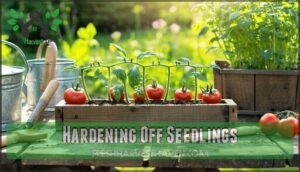
Why rush your tomato seedlings from cozy indoor warmth straight into the great outdoors?
Gradual seedling acclimation prevents transplanting shock and strengthens plants. Start hardening off seedlings one week before transplanting by placing them outside for 2-3 hours daily.
Increase outdoor exposure gradually while monitoring weather for unexpected frost. This process helps your tomato seedlings adjust to temperature changes, wind, and direct sunlight before permanent planting.
To guarantee a successful transplant, understanding optimal seed starting techniques is vital for healthy seedling development and preventing transplanting shock.
Transplanting in Late Afternoon
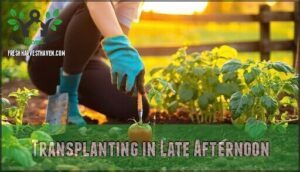
After hardening off your seedlings, timing your transplant matters more than you might think.
Plan to transplant tomato seedlings in late afternoon or early evening to minimize shock.
The cooler temperatures and reduced sunlight help newly transplanted seedlings adjust without the stress of peak sun exposure.
This transplant timing gives your plants the entire night to recover and establish before facing the next day’s heat.
Burying Stem for Root Growth
When transplanting your seedlings, bury about two-thirds of the stem underground.
This stem burial technique encourages robust root development along the buried portion, creating a stronger foundation.
The buried stem transforms into roots, improving plant stability and nutrient absorption.
Dig deep enough to accommodate the root ball plus additional stem depth.
This practice strengthens soil structure connection and provides sturdy support for heavy fruit loads later, leading to a more stable foundation.
Spacing Seedlings for Air Circulation
Once you’ve buried the stem correctly, proper seedling distance becomes your next priority.
Space your tomato plants 18-24 inches apart to guarantee adequate air circulation between them.
This plant spacing prevents moisture buildup that leads to fungal diseases, especially during cool spring weather.
Proper spacing also allows each plant’s root development to flourish without competition, supporting healthy growth patterns throughout the season.
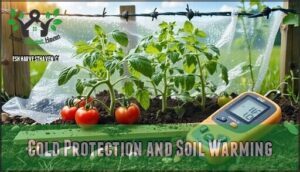
Cold Protection and Soil Warming
When you’re planting tomatoes early in spring, cold weather can quickly kill your tender seedlings or stunt their growth.
You’ll need reliable protection methods to shield your plants from frost and warm the soil for ideal root development.
Using Wall-O-Water
Wall-O-Water transforms winter planting by creating a protective microclimate around your tomatoes.
Wall-O-Water creates your tomato’s personal greenhouse, turning cold spring soil into a warm growing paradise.
These water-filled cylinders increase soil temperature up to 10°C higher than outside air, allowing early planting up to 6 weeks before typical frost-free dates while providing exceptional frost protection.
Using a water wall system can substantially enhance the growing process.
- Soil Warming Power: Pre-warm soil for 3 days before planting for maximum thermal benefit
- Frost Shield: Water chambers maintain nighttime temperatures above freezing during cold snaps
- Growth Boost: Tomatoes show 50% faster initial growth compared to unprotected seedlings
- Extended Season: Plant tomatoes 6 weeks earlier than traditional methods allow
- Setup Success: Fill water cells completely and anchor securely to prevent wind displacement
Row Cover Fabric
Row covers act like a cozy blanket for your tomato plants during chilly early spring nights.
Choose lightweight spun fabric that allows sunlight through while blocking cold air.
Simply drape the material over plants and secure edges with rocks or clips.
These frost protection methods maintain soil temperature and shield tender leaves from unexpected cold snaps, making row covers essential for cold weather tomatoes.
DIY Cold Protection Methods
Budget-friendly plastic milk jugs make excellent DIY cold protection methods.
Simply cut off the bottom of a gallon milk jug and place it over each transplant like a mini greenhouse.
Remove the cap for ventilation, then stake it down to prevent wind damage.
These makeshift cloches trap warm air around plants while allowing airflow, creating an effective barrier against unexpected frost and providing a simple method for cold protection.
Securing Plants From Frost
Beyond DIY solutions, you’ll want to anchor everything securely against wind and weather.
Stake down row covers and winter hoops firmly—a gust can turn your frost protection into a tomato plant guillotine!
Check your cold frames’ hinges and latches regularly.
For frost sensitive plants, monitoring weather forecasts becomes your nightly ritual.
Proper frost risk assessment means having backup protection ready when temperatures drop unexpectedly.
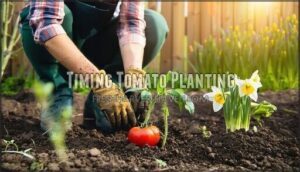
Timing Tomato Planting
Timing your tomato planting correctly can make the difference between a thriving garden and a disappointing harvest.
You’ll need to balance soil warmth, frost protection, and regional growing patterns to give your plants the best start possible.
Checking Last Frost Date
Before the last predicted frost date passes, you’ll need to check local frost risk through reliable weather forecasts and planting schedules.
Climate zones provide general guidance, but your specific frostfree date determines when it’s truly safe for planting tomatoes early without frost protection methods.
- Check NOAA weather stations or agricultural extension offices for your area’s average last frost date
- Monitor 7-day forecasts for unexpected late-season frost warnings that could damage tender seedlings
- Use zip code frost calculators from university extensions for hyperlocal frost dates and climate zone data
Understanding fall planting calendars is also essential for planning other seasonal crops.
Planting in Different Regions
Your regional climate dictates when to plant tomatoes, making geographic variations essential for success.
In the South, you can plant in January for April-May harvests, while mid-Atlantic gardeners should wait until spring.
Pacific Northwest growers plant in late spring, and Northeast/Midwest regions require late spring to early summer timing to avoid frost damage.
Considering USDA Hardiness Zone
Your USDA hardiness zones act like nature’s GPS for when to plant tomatoes.
These Zone Mapping systems divide regions by average winter temperatures, helping you nail the best time to plant tomatoes. Understanding your zone’s Climate Factors prevents frost-damaged seedlings and guarantees proper soil temperature timing.
Here’s what your hardiness zone tells you:
- Zones 3-5: Focus on short-season varieties and late May transplanting after soil temperature reaches 60°F consistently
- Zones 6-7: Mid to late April planting works well, with Regional Planting flexibility based on microclimates
- Zone 8: Early April starts are common, using season extension for even earlier frost-sensitive plantings
- Zones 9-11: Late winter planting possible due to minimal freeze risk and warmer Hardiness Levels year-round
Monitoring Weather for Late Frosts
Weather patterns can fool even experienced gardeners when late frosts strike unexpectedly.
Stay vigilant by checking frost alerts and monitoring nighttime temperatures closely. Late frosts damage tender tomato plants, making weather forecasts your best friend during spring planting season.
| Weather Factor | Action Required |
|---|---|
| Frost Alerts Active | Cover plants immediately |
| Temps Below 35°F | Use cold protection |
| Cold Snap Predicted | Delay transplanting |
| Soil Temp Under 50°F | Wait for warming |
Ensuring Successful Tomato Growth
Once your tomatoes are planted, consistent care guarantees they’ll thrive throughout the growing season.
Your success depends on providing the right balance of sunlight, water, nutrients, and protection from common garden problems, which includes ensuring the right amount of water.
Providing Adequate Sunlight
Your tomatoes need six to eight hours of direct sunlight daily to thrive.
After ensuring proper planting timing, sunlight exposure becomes your next priority for healthy growth and fruit production.
Choose locations that maximize warm temperatures and plenty of sunlight throughout the day.
Consider these sunlight requirements for ideal tomato placement:
- Morning sun exposure – positions plants to catch early light when daytime air temperatures begin warming
- Afternoon protection – shields from intense heat while maintaining adequate light reflection from nearby surfaces
- Strategic spacing – prevents larger plants from creating unwanted shading techniques that block smaller varieties
Watering and Fertilizing
Proper watering and fertilizing keep your tomato plants thriving.
Water deeply 1-2 times weekly, focusing on soil moisture rather than leaf wetness.
Use drip irrigation methods for efficient water conservation.
Begin fertilizing 3-4 weeks after transplanting with balanced fertilizer types.
Maintain nutrient balance by avoiding excessive nitrogen before flowering.
Monitor plant nutrition needs and adjust nutrient management based on growth stages for superior results.
To achieve ideal growth, understanding tomato fertilizer is vital for planting and maintaining healthy tomato plants.
Pruning and Training Plants
Once you’ve got watering and feeding down, it’s time to shape your plants for maximum harvest. Think of pruning as giving your tomatoes a good haircut – they’ll thank you with bigger, better fruit.
Here’s your plant training game plan:
- Remove suckers – Those sneaky shoots between main stems steal energy from fruit production
- Trim lower leaves – Clear out yellowing bottom foliage to improve airflow and prevent disease
- Install sturdy support – Stakes, cages, or trellises keep heavy branches from snapping under fruit weight
- Thin overcrowded branches – Give remaining stems room to breathe and access sunlight
Regular Plant Pruning and Stem Training keep your tomatoes focused on fruit rather than excessive foliage. Use sharp, clean tools for Leaf Removal to avoid spreading disease. Choose Tomato Support systems early – Plant Thinning works best when combined with proper pruning, stakes, cages, and trellises for ideal plant support.
Watching for Pests and Diseases
Early spring vigilance acts like your garden’s security system against unwanted invaders.
Scout weekly for aphids clustering on young leaves and distinctive tomato hornworms that can devastate plants overnight.
Watch for fungal infections like early blight’s dark spots and bacterial spots’ water-soaked lesions.
Implement integrated pest management using beneficial insects, copper fungicides for disease control, and proper spacing to prevent root rot in damp conditions.
Frequently Asked Questions (FAQs)
Can you plant tomatoes in the early spring?
Like planting a flag on unfrozen ground, you can plant tomatoes in early spring with proper preparation.
Wait until nighttime temperatures consistently stay above 50°F and use cold protection like row covers or Wall-O-Water for success, which includes using tools like row covers.
Can you plant tomato plants in March?
You can plant tomatoes in March in warmer zones, but wait until soil temperatures reach 65-70°F and nighttime temperatures stay above 50°F consistently to avoid cold damage.
How much sunlight do tomatoes need daily?
Picture those golden rays bathing your garden like nature’s spotlight – that’s exactly what your tomatoes crave.
You’ll need to provide them with six to eight hours of direct sunlight daily for ideal growth and fruit production, which is crucial for their development and fruit production.
What fertilizer works best for spring tomatoes?
You’ll get the best results by mixing continuous-release fertilizer with calcium directly into your soil at planting time, then following up with regular feeding throughout the growing season.
How often should I water young plants?
Young tomato seedlings are thirsty little drama queens that’ll wilt at the first sign of dry soil.
Water them daily, checking soil moisture with your finger.
Keep soil consistently moist but not waterlogged—soggy roots spell disaster for these tender plants.
When should I start pruning tomato plants?
Start pruning tomato suckers once your plants reach 12-18 inches tall with several sets of leaves.
You’ll want to remove those shoots growing between the main stem and branches weekly throughout the growing season, focusing on complete concepts like this one to improve plant health.
What are common early spring tomato pests?
Early spring tomato pests include cutworms, flea beetles, and aphids.
You’ll spot cutworms cutting seedling stems at soil level, while flea beetles create tiny holes in leaves, and aphids cluster on new growth sucking plant juices.
Conclusion
Master gardeners know that timing beats enthusiasm every time – just like planting beans too early, rushing tomatoes into cold soil creates more problems than patience ever could.
Successfully planting tomatoes in early spring requires balancing your keenness with smart protection strategies. You’ve learned the essential techniques: selecting cold-hardy varieties, warming soil properly, and using protective systems like Wall-O-Water or row covers.
Monitor your local frost dates closely and don’t skip the hardening-off process. With proper timing and protection, you’ll extend your growing season substantially while avoiding costly replanting disasters.
- https://www.gardendesign.com/tomato/watering.html
- https://swanhose.com/blogs/watering-vegetables/how-to-water-tomatoes-plants-in-the-garden-swan-hose
- https://www.bhg.com/how-often-to-water-tomatoes-7482436
- https://www.ruralsprout.com/tomato-watering-mistakes/
- https://www.reddit.com/r/vegetablegardening/comments/13hlsqm/how_often_do_you_water_your_tomatoes/

