This site is supported by our readers. We may earn a commission, at no cost to you, if you purchase through links.

Most gardeners don’t realize how much soil volume roots actually need until they’ve watched a tomato plant stall out in a shallow bed, roots coiling at the bottom like they’re trapped. That one mistake—underbuilding—costs a full season.
Raised garden beds for backyard homesteaders fix that problem from the ground up, giving you control over soil quality, drainage, and layout that in-ground planting rarely allows.
Pick the right dimensions, fill them with a smart soil blend, and you’re growing more food in less space than most people think possible.
Table Of Contents
Key Takeaways
- Map your yard’s sun patterns for at least three days before placing beds, then lock in south-facing, north-south-oriented spots to maximize light and warmth for heat-loving crops like tomatoes and peppers.
- A 4×8-foot bed hits the sweet spot for solo management and high yield, but root depth matters just as much — carrots and potatoes need 12 or more inches, while radishes get by with 6 to 8.
- Cedar and galvanized steel outlast cheaper materials by decades, and your soil blend — 50% topsoil, 30% compost, 20% organic matter — determines whether your plants thrive or stall out.
- Drip irrigation on a timer, hardware cloth across the bed base, and organic pest controls like neem oil and companion planting are what turn a decent garden into a low-maintenance, high-output system.
Plan Your Backyard Homestead Beds

Before you buy a single board or break any ground, a little planning saves you a lot of frustration later. The decisions you make right now — sun exposure, bed orientation, spacing, crop types — set the foundation for everything that grows after.
If space is tight, vertical gardening techniques for vegetables can help you squeeze more yield out of a small footprint without crowding your beds.
Here’s what to think through before you build.
Map Sunlight Patterns
Before you drive a single stake, spend three days walking your yard and noting where shadows fall — morning, noon, and late afternoon. Seasonal sun tracking reveals which zones actually hit full sun (6+ hours daily).
Use digital sun mapping tools or sunlight simulation tools to run shade pattern analysis across seasons. That shadow corridor impact from your fence or garage matters more than you think.
Choose South-facing Locations
Once you know where your full sun zones are, south-facing spots become your prime real estate. In the Northern Hemisphere, these locations deliver peak solar exposure from late morning into mid-afternoon — exactly when warmth retention matters most for crop suitability.
That solar gain speeds spring soil temps by several degrees, giving heat-lovers like peppers and tomatoes a real head start, supporting natural season extension and better water efficiency overall.
Orient Beds North-south
Once your south-facing spot is locked in, bed orientation becomes your next lever for controlling sunlight distribution. Running your raised garden beds north-south gives every plant balanced solar exposure as the sun tracks east to west.
Morning light hits the eastern edge; afternoon warmth covers the west — that natural microclimate management keeps growth even.
It also improves drainage along the bed length and reduces wind protection concerns on the longer sides.
Plan Wheelbarrow Access
Once your beds are oriented, think about how you’ll actually move through them. Keep garden pathways at least 36 inches wide — 40 inches along the central garden aisle lets two wheelbarrows pass without scraping. Plan corner clearances at staggered angles so wheels don’t catch.
Use compacted gravel or pavers as surface materials, add path lighting for early mornings, and position soil storage within 12 feet for quick transfers.
Match Beds to Crops
Not every crop belongs in the same bed.
Tomatoes and peppers need full-sun spots with 6-plus hours daily, while leafy greens handle 4 to 6 hours without bolting. Root depth matching matters too — carrots need 12 to 18 inches of ideal soil, but radishes manage fine in 6 to 8.
Layer in crop rotation, companion planting, and nutrient zone design to keep sunlight-soil alignment and root system health working together.
Choose Raised Bed Size

Getting the size right is the most important decision you’ll make before building. Too wide and you’ll be stretching across your bed constantly, which gets old fast.
Here are the key sizing factors that make the biggest difference.
Standard 4×8-foot Beds
A 4×8-foot raised garden bed is the sweet spot for backyard homesteaders — big enough for serious production, small enough to manage solo. At 48 by 96 inches, it fits through most backyard gates and lines up perfectly against fences.
- Maximizes yield with square-foot planting grids
- Facilitates Companion Planting and Crop Rotation layouts
- Fits standard lumber cuts for easy DIY raised garden bed assembly
- Suits Design Aesthetics in tidy backyard setups
- Simplifies Winterizing Beds each season
One-sided Reach Widths
If you can only reach from one side, cap your DIY raised garden bed at 2.5 to 3 feet wide. That keeps your Ideal Reach Zones within 28 to 30 inches — no awkward twisting.
Use your measuring tape and 16-inch lumber to plan Height-Width Alignment before cutting.
Tuck Crop Placement Tips and Task Placement Strategies into that inner 18 inches for ergonomic gardening that actually works.
Root Crop Soil Depth
Root vegetables are pickier about depth than most gardeners expect. Getting your bed depth right means the difference between straight, full-sized roots and stunted, forked ones.
Use these crop-specific depth guides to match ideal depth variations to what you’re planting:
- Radishes: 6–8 inches of raised bed soil
- Potatoes and carrots: 12 inches minimum for preventing root deformities
- Beets and parsnips: 12–18 inches with proper soil amendment
- Jerusalem artichokes: 18 inches for full tuber expansion
- All root vegetables: prioritize soil drainage and soil preparation techniques before planting
Plan successive planting depths early — it saves costly rebuilds later.
Accessible Ergonomic Heights
Your back shouldn’t pay the price for a great harvest.
For most adults, an ergonomic raised garden bed sits 18 to 24 inches high — ideal for seated reach and Wheelchair Access Beds setups. Adjustable Heights with telescoping legs allow Height Customization of 2 to 6 inches.
These Ergonomic Design Tips make elevated gardening genuinely comfortable, especially for Senior Gardening Ease without sacrificing DIY raised garden bed functionality.
Square-foot Planting Grids
A simple grid turns your raised garden beds into a precision growing machine.
Nail wood lath into 12-inch squares across your DIY raised garden bed, and square foot gardening suddenly makes sense — each cell tells you exactly how many plants fit. Carrots pack in 16 per square; peppers need just one or four.
This grid system also enables companion planting layouts, harvest tracking systems, and ideal plant spacing without guesswork.
Pick Safe, Durable Materials

The material you build with decides how long your beds last — and whether what grows in them is actually safe to eat.
Not every option you’ll find at the hardware store or salvage yard is worth your time or trust. Here’s a look at what actually holds up and why.
Cedar and Redwood Benefits
Cedar boards and redwood boards are the ideal choice for raised beds, and for good reason.
Both offer natural pest resistance through built-in oils and tannins that handle wood preservation without chemicals near your food. Weather-resistant properties keep them solid through wet-dry cycles for 10 to 20 years.
Heart redwood and FSC-certified cedar also deliver sustainable wood sources, long-term value, and aromatic garden benefits that subtly deter pests.
Pine and Fir Tradeoffs
Pine and fir cost less than cedar, but both come with real tradeoffs for raised garden beds.
Fir wins on structural strength and moisture tolerance — it resists warping better in cool, humid climates. Pine is widely available and affordable, but its decay resistance is poor without wood preservation treatment.
For a DIY raised garden bed on a budget, fir edges out pine in durability.
Galvanized Steel Options
Steel outlasts wood on every front — and galvanized raised beds are worth serious consideration for your DIY raised garden bed setup.
Different galvanizing techniques affect how long your beds last:
- Hot-dip galvanized steel delivers thick zinc coating and decades of coating durability
- Electro-galvanized offers a smoother finish with precise coverage
- Zinc-aluminum-magnesium hybrids give strong coastal resistance near salt air
- Galvannealed steel improves steel formability for custom shapes
Metal also retains heat, warming soil faster in spring.
Stone and Brick Beds
Stone and brick take durability to another level — a well-built raised garden bed in fieldstone or brick can last 50 to 100 years.
Mortar techniques like Portland cement joints lock everything tight, while traditional lime options allow slight flex through freeze-thaw cycles.
Brick patterns add classic structure, patio pavers and paving stones bring natural stone aesthetics, and the thermal benefits warm your soil earlier each spring.
Safe Upcycled Materials
Upcycling cuts costs and waste — but only if you source smart. Stick to heat-treated pallets marked "HT," reclaimed doors free of peeling paint, and untreated wood from old buildings.
Material Safety Checks matter: inspect every board for rot, loose nails, and chemical residue. Toxin-Free Sourcing means skipping railroad ties entirely.
Clean reclaimed goods with non-toxic treatments, and always use Safe Hardware — rust-free, lead-free screws and brackets only.
Top 5 Raised Bed Tools
Before you make a single cut, having the right tools in your hands makes all the difference. The wrong saw or the wrong screws can turn a simple build into a frustrating afternoon.
Here are the five tools that get the job done right.
1. Ridgid Dual Bevel Sliding Miter Saw
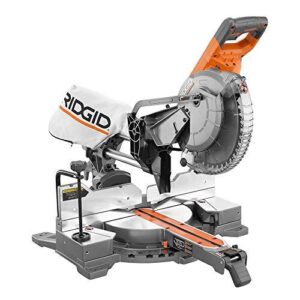
The RIDGID 10-inch Dual Bevel Sliding Miter Saw ($554.65) earns its spot in any serious homesteader’s shop.
Its 15-amp motor tears through 2x4s and 2x6s without hesitation, and the dual-bevel head tilts both directions — so you’re not flipping boards to reverse a cut.
The full 70° miter range manages steep crown angles easily. Quick-set detents lock in common angles fast, and the built-in LED cut line indicator keeps your marks accurate, even in a dim garage or shed.
| Best For | DIYers and serious homesteaders who regularly tackle trim work, crown molding, or framing and want a capable mid-range saw without the bulk of a 12-inch model. |
|---|---|
| Power Source | Corded electric |
| Primary Material | Steel/aluminum |
| Included Accessories | LED work light |
| Intended Use | Trim and lumber cuts |
| Corrosion Resistance | Standard steel body |
| Price Tier | Mid-range (~$555) |
| Additional Features |
|
- Dual-bevel head tilts both ways, so you skip the hassle of flipping boards for opposite-angle cuts
- Full 70° miter range handles steep angles like 54° crown molding without breaking a sweat
- Built-in LED and work light keep your cut line visible even in a poorly lit shop or garage
- Crown molding stops aren’t included — you’ll need to buy them separately
- The 10-inch blade means shallower cut depth compared to a 12-inch saw
- It’s corded, so you’re tethered to an outlet, and at $554.65 it’s not a budget pick
2. Skil Circular Saw Laser Guide
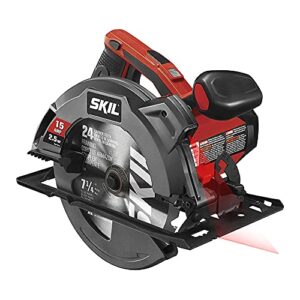
The SKIL 5280-01 circular saw ($109) is your go-to for ripping long boards when a miter saw won’t reach.
Its 15-amp motor hits 5,300 RPM, cutting through 2×12 cedar like it’s nothing.
The single-beam laser guide projects a clear line right along the blade edge — no guesswork on 8-foot rip cuts. A built-in dust blower keeps that line visible as you go.
At 8.7 pounds, it won’t wear your arms out mid-project.
| Best For | DIYers and homeowners who need a reliable, lightweight saw for ripping lumber and sheet goods without the bulk of a worm-drive. |
|---|---|
| Power Source | Corded electric |
| Primary Material | Steel/plastic |
| Included Accessories | Carrying case |
| Intended Use | Sheet goods and lumber |
| Corrosion Resistance | Standard steel body |
| Price Tier | Mid-range |
| Additional Features |
|
- 15-amp motor at 5,300 RPM powers through thick lumber without bogging down
- Laser guide takes the guesswork out of long rip cuts on full sheets of OSB or plywood
- At 8.7 pounds, it’s light enough to use all day without your arms giving out
- The trigger placement feels awkward to some users, which gets old fast on longer jobs
- The included carrying case is flimsy — don’t expect it to protect much
- The laser can arrive misaligned out of the box and needs a 3/32" Allen wrench to dial in
3. Deck Plus Epoxy Deck Screws
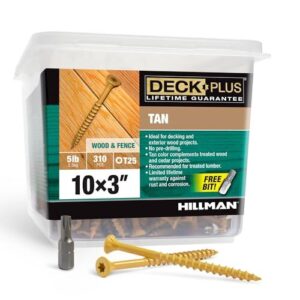
Every screw matters when you’re building something meant to last a decade. Deck Plus Epoxy Deck Screws ($29.98 for 310 pieces) are the right call for raised bed frames — especially if you’re using pressure-treated lumber.
The four-layer epoxy coating resists rust without reacting with ACQ or CA-treated wood.
The star/Torx T25 drive grips hard and won’t strip mid-drive. Self-drilling tips mean you skip pilot holes on most softwoods.
At about 3 inches long, they bite deep and hold tight.
| Best For | DIYers and contractors building decks, fences, or outdoor structures with pressure-treated lumber who want a reliable, rust-resistant screw without paying big-box prices. |
|---|---|
| Power Source | N/A (passive) |
| Primary Material | Carbon steel |
| Included Accessories | T25 driver bit |
| Intended Use | Outdoor fastening |
| Corrosion Resistance | 4-layer epoxy coating |
| Price Tier | Budget (~$30) |
| Additional Features |
|
- The 4-layer epoxy coating plays nice with ACQ and CA treated wood — no chemical reaction, no early rust
- Star/Torx T25 drive seriously cuts down on stripping and cam-out, even when you’re driving dozens in a row
- Self-drilling tips skip the pilot hole step on most softwoods, which saves real time on big projects
- The included T25 bit tends to wear out fast — grab a couple extras before you start a large deck
- Packaging can be flimsy, and a few buyers have gotten boxes that arrived already busted open
- End grain still needs a pilot hole, so it’s not a total drill-free experience in every situation
4. Milwaukee M18 Brushless Impact Driver
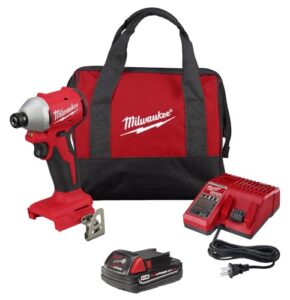
The Milwaukee M18 Brushless Impact Driver ($99, kit) is the workhorse you want driving those 3-inch deck screws all afternoon.
Its POWERSTATE brushless motor pushes up to 1,600 in./lbs. of torque at 3,200 RPM — enough to sink lag bolts without breaking a sweat.
At just 5.1 inches long, it fits where your arm barely reaches. REDLINK protection keeps it from overheating mid-project.
The included 2.0Ah battery and charger mean you’re ready to build right out of the box.
| Best For | Homeowners and weekend DIYers who need a reliable, compact driver for deck builds, repairs, and general fastening projects. |
|---|---|
| Power Source | Battery (18V M18) |
| Primary Material | Steel/composite |
| Included Accessories | Tool bag + charger |
| Intended Use | Driving fasteners |
| Corrosion Resistance | Brushless motor housing |
| Price Tier | Mid-range |
| Additional Features |
|
- Brushless motor means longer tool life and more runtime per charge — you’ll feel the difference on a full day of decking
- At 5.1 inches, it squeezes into tight spots and makes overhead work a lot less miserable
- 1,600 in./lbs. of torque handles lag bolts and heavy fasteners without fuss
- Not a Fuel-series tool, so heavy-duty pros may find it underpowered compared to Milwaukee’s top-tier lineup
- The trigger is very responsive — great for big fasteners, but it can strip small screws or trim hardware fast if you’re not careful
- A few buyers have reported quality control hiccups, like dead batteries or missing reverse function straight out of the box
5. ECOgardener Landscape Fabric Weed Barrier
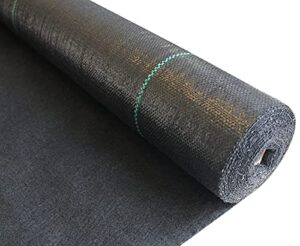
Before you build a single frame, lay down the ECOgardener Landscape Fabric Weed Barrier — it’s the foundation that saves you hours of weeding later. This 4×50-foot roll weighs just 7.26 lbs., and its dual-layer, 5 oz. woven construction blocks weeds while letting water, air, and nutrients pass straight through.
Lay it felted-side down, cut it to fit, and stake the edges tight. It works with drip irrigation, withstands foot traffic, and holds up across multiple growing seasons.
| Best For | Gardeners who want a low-maintenance way to keep weeds out of vegetable beds, pathways, or planting areas without reaching for herbicides. |
|---|---|
| Power Source | N/A (passive) |
| Primary Material | Woven polypropylene |
| Included Accessories | None listed |
| Intended Use | Weed suppression |
| Corrosion Resistance | UV-resistant fabric |
| Price Tier | Budget |
| Additional Features |
|
- Lets water, air, and nutrients through so your plants don’t suffer while weeds do
- Works under mulch, gravel, or even foot traffic — flexible enough for a lot of setups
- Reusable across seasons, so you’re not buying new fabric every year
- Weeds can eventually push through at cut edges or stake holes if not carefully secured
- Needs stakes or edging to stay flat — wind will lift it if you skip that step
- Some rolls have excess fibers on the smooth side, which points to inconsistent manufacturing quality
Build Your Raised Bed Frame
Once you’ve got your materials ready, it’s time to put the frame together.
The steps are straightforward, and if you take them in order, you won’t have to backtrack or redo your work. Here’s exactly how to cut, fasten, and set your raised bed frame the right way.
Measure and Cut Lumber

Start with a sharp pencil and your measuring tape — accuracy here saves you from costly remakes.
For a standard 4×8 bed, cut two side boards at 96 inches and two end boards at 45 inches. Account for kerf allowance (about ⅛ inch per cut) when marking.
Use a miter saw for clean crosscuts, keep your saw alignment true, and always follow basic cut safety with eye protection on.
Pre-drill Pilot Holes

Once your boards are cut, don’t reach for the screws yet — skipping pilot holes splits lumber along the wood grain alignment every time.
For pine, drill 1/8 to 3/16 inch holes at 70 to 90 percent of your screw shank sizing. Keep these tips close:
- Match bit diameter carefully to your deck screws to prevent splits
- Use a depth stop for consistent depth accuracy across every joint
- Swap dull bits often — bit maintenance tips keep edges clean and holes true
Fasten Corners Securely

Now that your pilot holes are ready, drive 2-inch stainless deck screws at each corner using your power drill — they resist rust and grip lumber tight.
Reinforce every joint with inside and outside corner brackets; bracket types like L-brackets and mending plates handle both angle bracing and joint reinforcement well.
Finish with weatherproof silicone on each seam — simple sealing techniques that stop moisture before rot starts.
Brace Long Bed Sides

Once your corners are locked in, long sides need extra help — soil pressure will bow out even solid lumber over time.
- Attach galvanized mending braces along the outside center of any side longer than 6 feet.
- Use deck screws with pre-drilled pilot holes for solid load support.
- Apply exterior wood glue before fastening for stronger brace-to-material joints.
- Inspect annually for bow prevention and re-tighten loose corner brackets.
Check Level Placement

Even a well-built frame can drift — so check level placement before filling. Set a long spirit level on the top rail and reference a fixed standard alignment point on the frame. Use shim adjustments at each corner, then recheck after adding soil.
For longer beds, laser techniques catch subtle height drift fast. Post-fill checks keep your north-south orientation true and your planting rows clean.
Fill Beds With Healthy Soil

Your frame is built, your bed is level — now it’s time to feed it. The soil you fill it with will make or break everything you grow, so getting this part right matters more than most people realize.
Here’s what you need to know about building a healthy, productive mix from the ground up.
Compost-rich Soil Blends
Think of compost as your raised garden beds’ engine — it drives everything. A solid Carbon Content base, like aged leaf mold or wood chips, builds texture and feeds your Microbial Boost over time.
Here’s what goes into an optimized soil mixture for organic cultivation:
- Mix in worm castings for an instant Nutrient Mix
- Add kelp or seaweed meal for Water Retention and trace minerals
- Source from Sustainable Sources — kitchen scraps, yard waste, composted manure
- Layer soil and compost to keep your living ecosystem active
Topsoil and Organic Matter
Most raised bed failures trace back to skipping good topsoil.
A balanced blend — 50% quality topsoil, 30% compost, and 20% organic matter like worm castings — creates an optimized soil mixture that facilitates Soil Aggregation, Microbial Habitat, and Nutrient Cycling all at once. That organic material also manages Water Retention and pH Buffering, keeping your plants fed and stable through every season.
The perfect raised bed soil blends 50% topsoil, 30% compost, and 20% organic matter to feed, drain, and stabilize every plant through every season
Vermiculite for Drainage
Vermiculite is the quiet workhorse of any ideal soil mix — it balances water retention and drainage in your raised garden bed without weighing the mix down.
For soil layer placement, blend it into the lower half at about 10 to 20 percent by volume.
Those flaky particles create air pockets, delivering a real aeration boost while preventing soggy roots between waterings.
Seasonal Compost Top-dressing
Your soil and compost relationship doesn’t end at planting — it’s a living partnership you tend all year.
For Spring Application Timing, spread 1 to 2 inches of fresh compost across your raised garden beds just as temperatures warm. A Fall Nutrient Boost works the same way, feeding soil through winter.
Always check Ideal Layer Depth, keep it under 3 inches, and do basic Compost Quality Checks — screened, weed-free, well-decomposed material only.
Mulch After Planting
Mulch is the quiet workhorse of raised bed gardening — it manages weed prevention, locks in moisture, and feeds your soil and compost system as it breaks down.
Apply a 2-to-3-inch layer using these Layering Techniques and Material Choices:
- Ideal Thickness: 2–3 inches suppresses weeds without suffocating roots.
- Stem Guarding: Keep mulch 2 inches from stems to prevent rot.
- Material Choices: Straw, wood chips, or shredded leaves all work well.
- Decomposition Rates: Organic mulch breaks down slowly, improving soil structure over months.
- Garden Maintenance: Replenish mulch as it thins throughout the season.
Add Irrigation and Pest Protection

Once your bed is built and filled, the next step is protecting what grows inside it.
A solid irrigation setup and a few smart barriers can mean the difference between a thriving harvest and a frustrating one. Here’s what you need to set up both.
Install Drip Irrigation Lines
Once your beds are built, drip irrigation keeps everything running on autopilot.
| Component | Spec | Purpose |
|---|---|---|
| Main line tubing | ½-inch PVC pipe | Primary water path |
| Emitter lines | ¼-inch micro irrigation | Reaches each plant |
| Pressure regulator | 25 psi | Pressure regulation |
| Backflow preventer | Faucet-mounted | Backflow prevention |
| Inline filter | Clean every 4–12 weeks | Prevents clogging |
Be sure to size your system within the allowable zone flow range to prevent overload. Space emitter branches every 18–24 inches for even coverage.
Flush the system before sealing — system flushing clears debris. Use a timer for automatic drip irrigation cycles, and winterize with freeze protection before temperatures drop.
Block Weeds Underneath
Before your first seed goes in, cut weeds off at the source.
Lay contractor-grade landscape fabric flat across the bed base, securing it with staples every 12 inches — this is your Mulch-Barrier Synergy foundation. Cardboard Layering underneath adds a second line of defense.
Use Edge Root Blocks along borders, apply Pre-Plant Smothering for existing growth, and schedule Seasonal Fabric Checks to catch tears early.
Add Hardware Cloth
Landscape fabric manages weeds, but hardware cloth manages the diggers. Staple ½-inch galvanized mesh flat across your raised garden bed’s base — this is your gopherproofing and rodent protection layer.
Use tin snips for custom fitting around corners, overlap seams by 3 inches, and secure edges every 6 inches.
Irrigation integration stays clean above the mesh. Schedule annual maintenance checks, and always wear gloves — safe handling matters with sharp mesh edges.
Build Rabbit Barriers
Hardware cloth stops diggers, but rabbits work above ground. For solid plant protection, bury your underground barrier 12 inches deep, bending the bottom edge outward 6 inches to block tunnelers.
Fence height matters — 30 inches minimum stops most rabbits cold. Choose galvanized hardware cloth over chicken wire or a loose wire cage; it resists gnawing better.
Gate security means gaps under a quarter inch, sealed tight.
Use Organic Pest Controls
Organic gardening doesn’t mean going it alone against pests.
Pair beneficial insects like lady beetles and lacewings with companion planting — basil near tomatoes, nasturtiums as trap plants. Add microbial controls like Bt for caterpillars and nematodes for soil grubs.
Cultural practices like crop rotation and sanitation break pest cycles year after year.
Organic pesticides such as neem oil handle stragglers without poisoning your critter-proof raised garden.
Frequently Asked Questions (FAQs)
What is an alternative to raised beds?
Not ready to build a frame? Ground Level Gardens, In-Ground Planting, Container Gardens, Hugelkultur Mounds, and Straw Bale Gardens all work.
So do cinder block setups, keyhole gardens, gabion raised beds, and container gardening with straw bale planters.
How do I winterize my raised beds?
When winter rolls in, mulch beds with 4 to 6 inches of straw. Plant cover crops like winter rye.
Add a cold frame for season extension. Top-dress with compost. And inspect boards for rot.
Can I grow raised beds on concrete or pavement?
Yes, concrete is just a different kind of ground.
Use bottomless raised bed frames or planter boxes with drainage holes, add gravel, and plan for urban heat reflection and runoff drainage solutions.
Which vegetables grow well together in beds?
Some vegetables are natural teammates.
Tomatoes and basil repel shared pests, carrots and onions confuse root flies, and beans feed nitrogen-hungry lettuce — smart companion planting turns one bed into a high-yield, self-supporting system.
How do I fix waterlogged or compacted raised bed soil?
Fork the soil every 6 to 8 weeks for aeration, layer 2 to 4 inches of sand, boost organic matter, and add a French drain at the bed edge to restore drainage fast.
When should I rotate crops between beds?
Don’t wait until something goes wrong.
Rotate crops between raised garden beds every harvest, following a four-year cycle — this breaks pest cycles, balances nutrients, and gives soil the rest periods it needs.
Conclusion
What separates a productive backyard homestead from a struggling one? Usually, it’s just a few smart decisions made before the first seed goes in.
Raised garden beds for backyard homesteaders give you something in-ground planting never can—full control over your soil, your space, and your season. Build the frame right, fill it deep, protect it well, and your beds will keep producing long after that first harvest.